I have just installed the Ubuntu-Mate 20.04 release to replace 18.04.
Up until 18.04 I had been using "Shutter" for taking and annotating screenshots. It was a wonderfully useful tool. Unfortunately, it did not work on 18.04 as it had before, and I had to hunt around for a way to "get-it-to-work" [Ubuntu-Mate 18.04 - Shutter (screenshot tool) - how to restore the "Edit" function].
Flameshot
[https://github.com/lupoDharkael/flameshot]
While I was using 18.04 I kept my ears open (I listen to a number of FLOSS / Linux podcasts) for alternatives to "Shutter". The application "flameshot" was mentioned on the Destination Linux Podcast [https://destinationlinux.org/], episode 110. I adopted flameshot as my regular screenshot tool. After a while it was added to the 18.04 repositories, and since then can be installed using the "Synaptic" package manager.
To install Synaptic on 20.04
go to the "Software Boutique" / choose the section "More Software" / install "Synaptic Package Manager".
To install flameshot using Synaptic
To install flameshot open Synaptic and enter the search term "flameshot", mark it for installation and click "apply".
Set the "Print Screen" key to open flameshot
(quoted and adapted from FOSSPOST [https://fosspost.org/reviews/programs/flameshot-amazing-screenshot-tool].
By default on most Linux distributions, when you hit the PrintScreen button on the keyboard, the default screenshot tool (E.g GNOME Screenshot) will take a picture of the entire desktop. Instead of doing this, we want Flameshot to launch automatically when we hit the PrintScreen button.
To do this, depending on your desktop environment, open your Keyboard Shortcuts window (Control Centre > Keyboard Shortcuts) and add a new shortcut. Note, that in the field "command" you need to enter "flameshot gui". Follow the rest of the procedure to allocate the keyboard binding "Print Screen" key to this command.
For my personal use flameshot had one major drawback; I could not change the size of "text" added as an annotation to a screenshot. So I kept looking, and while once again listening to the Destination Linux Podcast [https://destinationlinux.org/episode-174/] heard about "Ksnip".
Ksnip
[https://github.com/ksnip/ksnip].
Note that Ksnip is not a KDE application.
I consider Ksnip to be a full replacement for Shutter - it does everything that I want it to do.
Fig. 1
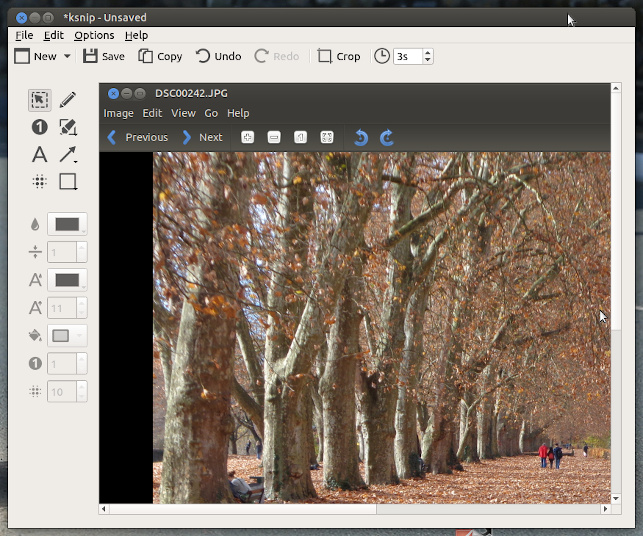
Installation options
The developers provide RPM and DEB packages as well as the "containerised formats" snap and AppImage for Linux; I decided to use the "Appimage" package.
How to set the "Print Screen" key to open Ksnip Appimage.
As I am using an AppImage, the procedure is a little longer.
- The problem is that the "Keyboard Shortcuts" dialogues cannot "see" the Ksnip AppImage.
Make Ksnip "discoverable"
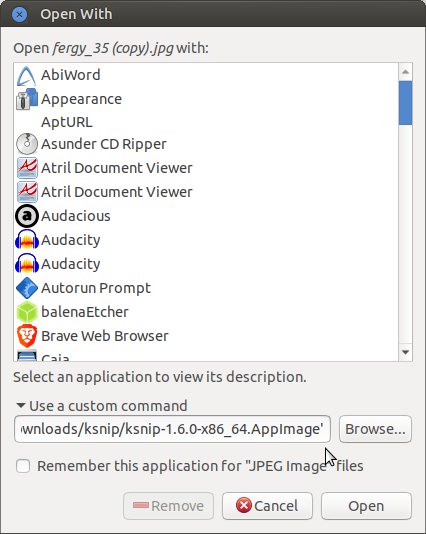
You can get around this problem by selecting any ".jpg" image in your pictures collection and using the right-mouse-click, and then selecting "open with" and the "other application" option.
At the bottom of that window
Fig. 2
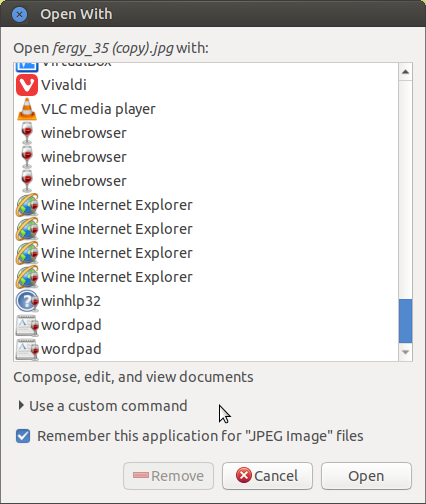
there is a right pointing arrow and the text "Use a custom command". Click on the arrow to unfold the empty "path-to-program" box and the "Browse.." button.
Fig. 3
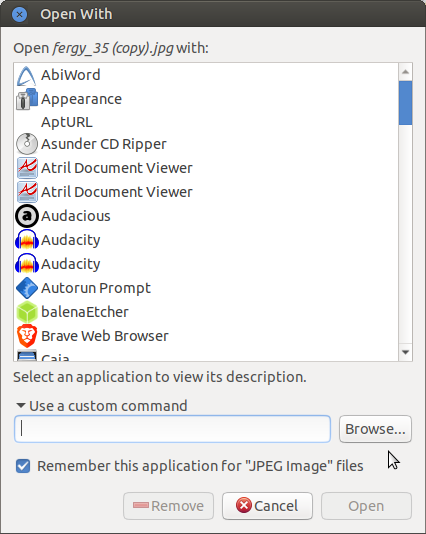
Clicking on the Browse... button - opens a file-manager window and you can navigate to the folder where you saved your Ksnip AppImage file.
Fig. 4
Select the AppImage and close the window by clicking on the "Open" button.
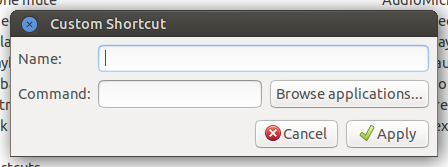
Set the Print Screen key to open Ksnip
Open your Keyboard Shortcuts window (Control Centre > Keyboard Shortcuts)
Fig. 5

Click on the button "Add" to add a new shortcut.
In the field "Name:" write "Ksnip". You can leave the field "command" empty.
Click on "Browse applications".
Fig. 6
Locate and "select" the Ksnip Appimage from the list.
Fig. 7
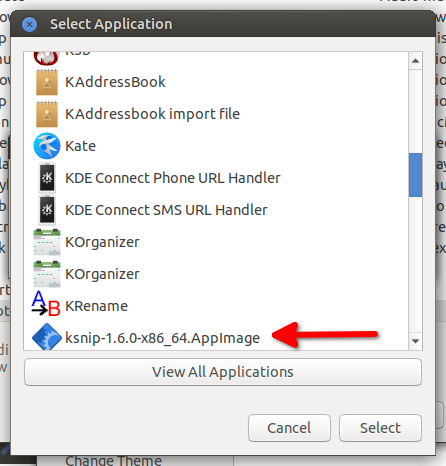
Fig. 8

The "Name" (1) and "Command" (2) fields have now been automatically filled. Click on "Apply" (3).
Fig. 5 (again)
- Now double-click on the "screenshot-ksnip" being careful to click within the column "Shortcut" (where the word "Print" is found in this example).
- Now press the Print Screen key on your keyboard.
Finished!
Shutter
There is good news for Shutter fans. Alan Pope announced on the Ubuntu Podcast season 13, episode 10 [https://ubuntupodcast.org/2020/06/01/s13e10-hospital-on-wednesdays/] (start at 42 mins 24 seconds, finishes at 44 mins 11 seconds), that Shutter is his favourite screenshot tool... and that he had just finished packaging it as a "snap" package. It can be installed on snap-enabled distributions with the following terminal command:
snap install shutter
Summary
If you were looking for a full-featured screenshot tool, I hope this post might help you to find one that meets your requirements.