Ok. As promised, it is done. Below is what you will be seeing:
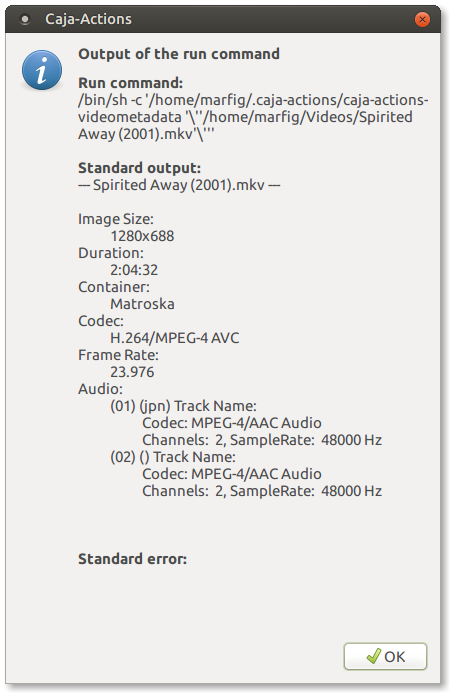
It uses the dialog window offered by caja-actions. It is not the most ideal for this purpose. But for now it will do. I'll be improving the script later on and it will eventually make use of its own window, where I will have more formatting opportunities.
The data you will have access on will depend on the video container type. The script is also planned to include any subtitle tracks in the video file, but because that dialog box is not scrollable, I removed this for now until it display the information on its own window.
The audio tracks are already displayed however. The format for the first line of each track is (trackNo) (language) Track Name. If the parenthesis in the language are empty, it only means the author forgot to specify the language.
Installation
Step 1. Install the required software.
You will want caja-actions to execute the script and exiftool which is the program the script uses to collect the video file metadata.
Open a terminal window and execute these commands:
$ sudo apt-get update
$ sudo apt-get install caja-actions libimage-exiftool-perl
Make sure everything is alright by typing exiftool -ver at your command prompt. You should get back the program version. At this time that's 10.10.
As for the caja-actions, you should see a new entry in your menu, under System -> Preferences -> Look and Feel, named "Caja-Actions Configuration Tool".
Step 2. Install the script.
We are now going to install the script that does it for you. It's named videometadata.
Create a new directory in your home folder named ".caja-actions".
from your terminal window go inside that new directory you just created and type:
$ git clone GitHub - Rahtgaz/caja-actions-scripts: Scripts in python and bash for the caja-actions plugin
After that is done, type the following commands to make the script executable:
$ cd caja-actions-scripts/python
$ chmod +x videometadata
Step 3. Set Caja-actions to use the script
We are now going to finish by setting the script inside caja-actions. Cool stuff.
-
Close any Caja instances you may have opened.
-
Open the Caja-Actions Configuration Tool by going to System -> Preferences -> Look and Feel
-
Start by clicking the Define New Action button in the toolbar (leftmost icon button)
-
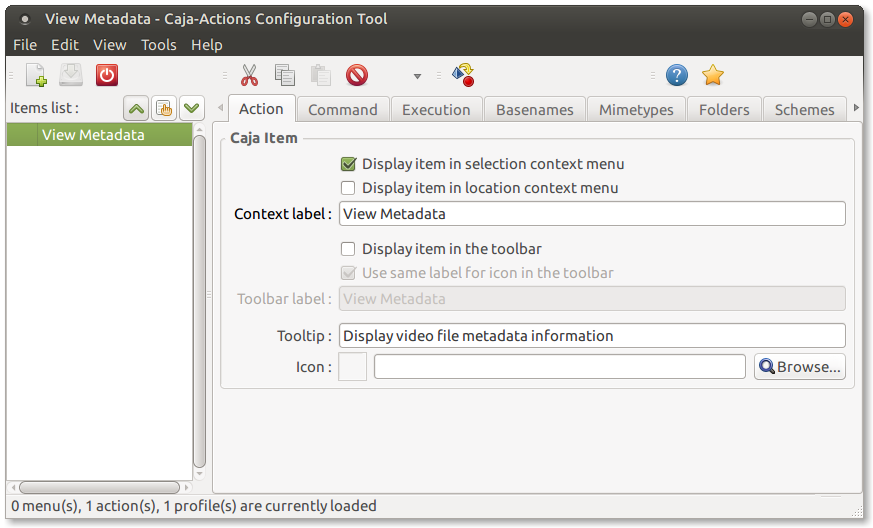
These are the settings for the Action tab:
-
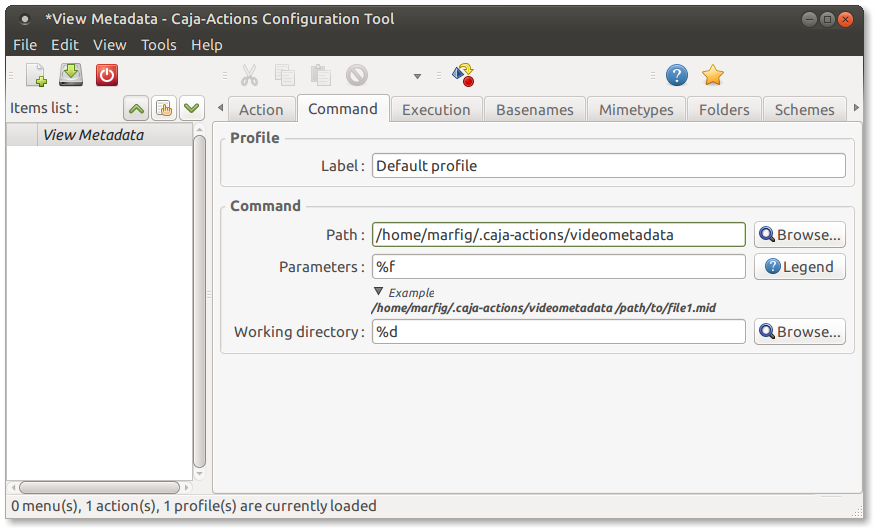
Now the settings for the Command tab (the Path should be different for you of course):
-
In the Execution tab, choose Display Output from the options given.
-
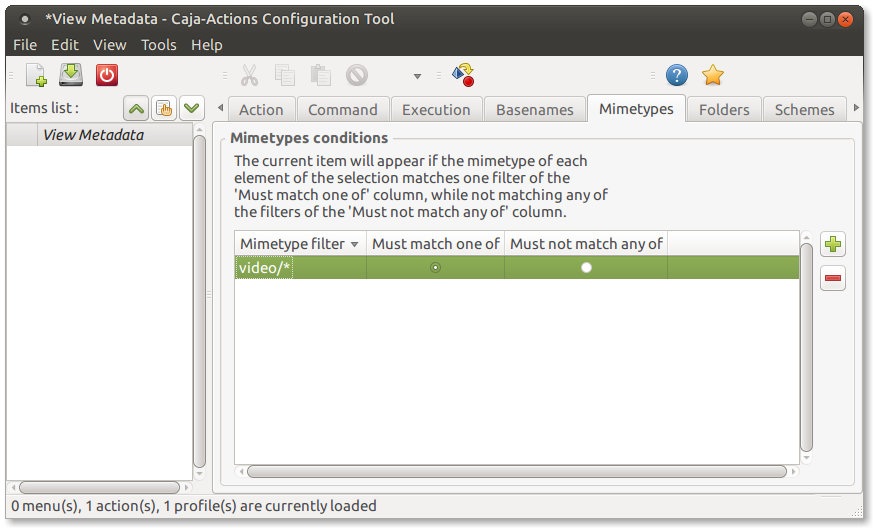
Skip the Basenames tab and go to the Mimetypes tab. Here we want to set it like you see below:
-
Skip the next three tabs and go to the Environment tab. In here you want to set the Count exactly equal to 1. This will mean that the option to view the metadata will only show if you select 1 file, not multiple files. Currently the script can only accept one file as argument.
-
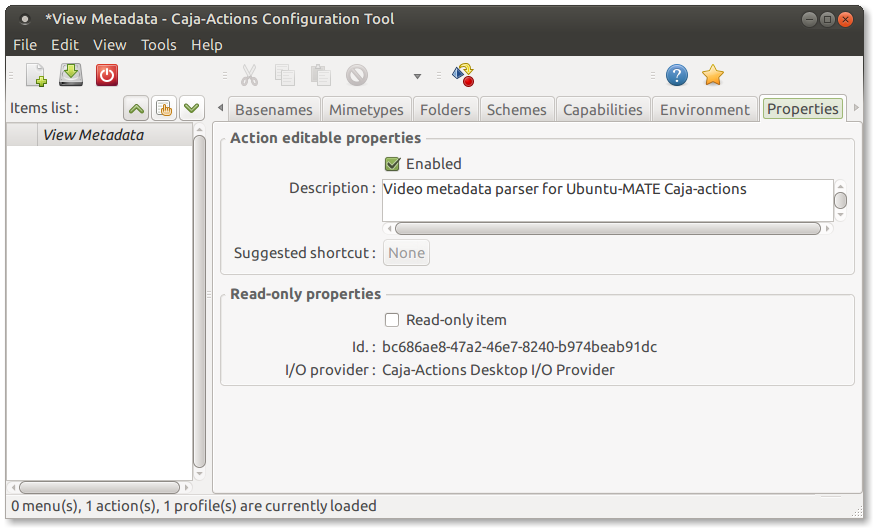
The last Properties tab is not essential, but it doesn't hurt:
-
You are done. Save everything by clicking the Save button.
Usage
Whenever you right click a video file in caja, you will now see a new entry in the menu named Caja-Actions actions. And in the submenu you will see View Metadata. You can click it to see the information of the video file.