I d/l cnijfilters2-5, extracted, I see
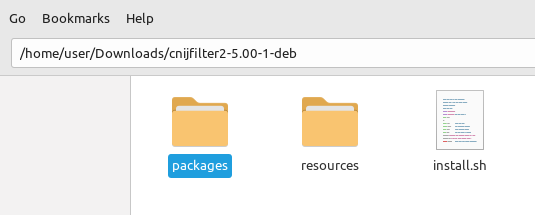
cd Downloads/cnijfilter2-5.00-1-deb/

sudo ./install.sh
That really complicates matters, because it involves a different set of "networking" functions for wireless/wifi. ![]()
If both your computer and your printer are on a private LAN on your side of the firewall-router modem, then you are secure, as long as you have "blocked appropriate" WAN ports by your modem (assuming they have some built-in default protective settings).
Normally, "proper" firewall on the modem means no real need for a firewall on your internal devices, as long as the exposed LAN ports are blocked on the WAN side, you are covered.
HOWEVER, if LAN-attached servers block all non-LAN traffic for those services intended for LAN-only, again, you should be covered. ![]()
That command gave me an error. What happens when you try:
netstat -ano | grep '/i' | grep "631"
$telnet <IP address or hostname> 631
Being able to open a telnet session without error gives you confirmation that your computer does has open port access to/from that port.
nmap -p 631 --script ipp-info <target-ip>
In that command, target-ip would be you computer's LAN address, i.e. 192.168.1.###, not the printer's .
... and once you reach that, more modern printers would have a function to define a security password to prevent inappropriate manipulation of settings.
If you go here
download the manual for MacOS (first on list) and go down to "page 177", where info for networking begins. That will provide some much needed details.
IF POSSIBLE, you may wish to try configuring with "cable-attached" internet, giving the printer a fixed IP address, before unplugging the cable and going wireless.
To see what your computer is dealing with during a power-up of your printer,
tail -f /var/log/syslog, andThat will reveal the sequence of events involved in handling your printer.
For debugging, you will need to get into the system logs for CUPS. Before your next attempt at accessing the printer, you should do the following:
cupsctl --debug-logging             ### activation of debug logging
cupsctl LogLevel=debug2         ### specifying verbosity of debug info
Once debugging is over, you should minimize CUPS logging by entering
cupsctl --no-debug-logging
Then view the errolog using the command:
tail -n 100 -f /var/log/cups/error_log | more
You may wish to scan the following URL for some insights:
If all else fails, you may be forced to perform the printer configuration using an Android, Mac, or Windows computer, using Canon's "IJ Network Tool", before re-attempting to perform the "hook-up" for your Linux-based wireless connection. ![]()
That software would be available from here:
I found the reference to the "IJ Network Tool" for Linux. ![]()
Alternate software sources:
anthony@anthony-OptiPlex-9010:~$ netstat -ano | grep '/i' | grep "631"
anthony@anthony-OptiPlex-9010:~$ telnet 192.168.1.1 631
Trying 192.168.1.1...
telnet: Unable to connect to remote host: Connection timed out
anthony@anthony-OptiPlex-9010:~$ telnet 192.168.1.1 631
Trying 192.168.1.1...
telnet: Unable to connect to remote host: Connection timed out
anthony@anthony-OptiPlex-9010:~$ telnet 192.168.1.17 631
Trying 192.168.1.17...
telnet: Unable to connect to remote host: No route to host
anthony@anthony-OptiPlex-9010:~$ telnet 192.168.1.76 631
Trying 192.168.1.76...
telnet: Unable to connect to remote host: Connection timed out
anthony@anthony-OptiPlex-9010:~$ telnet anthony-OptiPlex-9010 631
Trying 127.0.1.1...
telnet: Unable to connect to remote host: Connection refused
I have Spectrum internet, and through their Android app, I can see all devices connected to the network. The printer's IP is listed as: 102.168.1.76 My router's IP is 192.168.1.33
I used Gufw to create a rule for tcp port 631 that allows in.
anthony@anthony-OptiPlex-9010:~$ telnet 192.168.1.76 631
Trying 192.168.1.76...
^Ztelnet: Unable to connect to remote host: Connection timed out
anthony@anthony-OptiPlex-9010:~$ nmap    -p 631     -sV 192.168.1.0/24     -v
Starting Nmap 7.95 ( https://nmap.org ) at 2025-07-06 14:01 CDT
NSE: Loaded 47 scripts for scanning.
Initiating Ping Scan at 14:01
Scanning 256 hosts [2 ports/host]
Completed Ping Scan at 14:01, 5.30s elapsed (256 total hosts)
Initiating Parallel DNS resolution of 3 hosts. at 14:01
Completed Parallel DNS resolution of 3 hosts. at 14:01, 0.02s elapsed
Nmap scan report for 192.168.1.0 [host down]
Nmap scan report for 192.168.1.2 [host down]
Nmap scan report for 192.168.1.3 [host down]
Nmap scan report for 192.168.1.4 [host down]
Nmap scan report for 192.168.1.5 [host down]
Nmap scan report for 192.168.1.6 [host down]
Nmap scan report for 192.168.1.7 [host down]
Nmap scan report for 192.168.1.8 [host down]
Nmap scan report for 192.168.1.9 [host down]
Nmap scan report for 192.168.1.10 [host down]
Nmap scan report for 192.168.1.11 [host down]
Nmap scan report for 192.168.1.12 [host down]
Nmap scan report for 192.168.1.13 [host down]
Nmap scan report for 192.168.1.14 [host down]
Nmap scan report for 192.168.1.15 [host down]
Nmap scan report for 192.168.1.16 [host down]
Nmap scan report for 192.168.1.17 [host down]
Nmap scan report for 192.168.1.18 [host down]
Nmap scan report for 192.168.1.19 [host down]
Nmap scan report for 192.168.1.20 [host down]
Nmap scan report for 192.168.1.21 [host down]
Nmap scan report for 192.168.1.22 [host down]
Nmap scan report for 192.168.1.23 [host down]
Nmap scan report for 192.168.1.24 [host down]
Nmap scan report for 192.168.1.25 [host down]
Nmap scan report for 192.168.1.26 [host down]
Nmap scan report for 192.168.1.27 [host down]
Nmap scan report for 192.168.1.28 [host down]
Nmap scan report for 192.168.1.29 [host down]
Nmap scan report for 192.168.1.30 [host down]
Nmap scan report for 192.168.1.31 [host down]
Nmap scan report for 192.168.1.32 [host down]
Nmap scan report for 192.168.1.34 [host down]
Nmap scan report for 192.168.1.35 [host down]
Nmap scan report for 192.168.1.36 [host down]
Nmap scan report for 192.168.1.37 [host down]
Nmap scan report for 192.168.1.38 [host down]
Nmap scan report for 192.168.1.39 [host down]
Nmap scan report for 192.168.1.40 [host down]
Nmap scan report for 192.168.1.41 [host down]
Nmap scan report for 192.168.1.42 [host down]
Nmap scan report for 192.168.1.43 [host down]
Nmap scan report for 192.168.1.44 [host down]
Nmap scan report for 192.168.1.45 [host down]
Nmap scan report for 192.168.1.46 [host down]
Nmap scan report for 192.168.1.47 [host down]
Nmap scan report for 192.168.1.48 [host down]
Nmap scan report for 192.168.1.49 [host down]
Nmap scan report for 192.168.1.50 [host down]
Nmap scan report for 192.168.1.51 [host down]
Nmap scan report for 192.168.1.52 [host down]
Nmap scan report for 192.168.1.53 [host down]
Nmap scan report for 192.168.1.54 [host down]
Nmap scan report for 192.168.1.55 [host down]
Nmap scan report for 192.168.1.56 [host down]
Nmap scan report for 192.168.1.57 [host down]
Nmap scan report for 192.168.1.58 [host down]
Nmap scan report for 192.168.1.59 [host down]
Nmap scan report for 192.168.1.60 [host down]
Nmap scan report for 192.168.1.61 [host down]
Nmap scan report for 192.168.1.62 [host down]
Nmap scan report for 192.168.1.63 [host down]
Nmap scan report for 192.168.1.64 [host down]
Nmap scan report for 192.168.1.65 [host down]
Nmap scan report for 192.168.1.66 [host down]
Nmap scan report for 192.168.1.67 [host down]
Nmap scan report for 192.168.1.68 [host down]
Nmap scan report for 192.168.1.69 [host down]
Nmap scan report for 192.168.1.70 [host down]
Nmap scan report for 192.168.1.71 [host down]
Nmap scan report for 192.168.1.72 [host down]
Nmap scan report for 192.168.1.73 [host down]
Nmap scan report for 192.168.1.74 [host down]
Nmap scan report for 192.168.1.75 [host down]
Nmap scan report for 192.168.1.76 [host down]
Nmap scan report for 192.168.1.77 [host down]
Nmap scan report for 192.168.1.78 [host down]
Nmap scan report for 192.168.1.79 [host down]
Nmap scan report for 192.168.1.80 [host down]
Nmap scan report for 192.168.1.81 [host down]
Nmap scan report for 192.168.1.82 [host down]
Nmap scan report for 192.168.1.83 [host down]
Nmap scan report for 192.168.1.84 [host down]
Nmap scan report for 192.168.1.85 [host down]
Nmap scan report for 192.168.1.86 [host down]
Nmap scan report for 192.168.1.87 [host down]
Nmap scan report for 192.168.1.88 [host down]
Nmap scan report for 192.168.1.89 [host down]
Nmap scan report for 192.168.1.90 [host down]
Nmap scan report for 192.168.1.91 [host down]
Nmap scan report for 192.168.1.92 [host down]
Nmap scan report for 192.168.1.93 [host down]
Nmap scan report for 192.168.1.94 [host down]
Nmap scan report for 192.168.1.95 [host down]
Nmap scan report for 192.168.1.96 [host down]
Nmap scan report for 192.168.1.97 [host down]
Nmap scan report for 192.168.1.98 [host down]
Nmap scan report for 192.168.1.99 [host down]
Nmap scan report for 192.168.1.100 [host down]
Nmap scan report for 192.168.1.101 [host down]
Nmap scan report for 192.168.1.102 [host down]
Nmap scan report for 192.168.1.103 [host down]
Nmap scan report for 192.168.1.104 [host down]
Nmap scan report for 192.168.1.105 [host down]
Nmap scan report for 192.168.1.106 [host down]
Nmap scan report for 192.168.1.107 [host down]
Nmap scan report for 192.168.1.108 [host down]
Nmap scan report for 192.168.1.109 [host down]
Nmap scan report for 192.168.1.110 [host down]
Nmap scan report for 192.168.1.111 [host down]
Nmap scan report for 192.168.1.112 [host down]
Nmap scan report for 192.168.1.113 [host down]
Nmap scan report for 192.168.1.114 [host down]
Nmap scan report for 192.168.1.115 [host down]
Nmap scan report for 192.168.1.116 [host down]
Nmap scan report for 192.168.1.117 [host down]
Nmap scan report for 192.168.1.118 [host down]
Nmap scan report for 192.168.1.119 [host down]
Nmap scan report for 192.168.1.120 [host down]
Nmap scan report for 192.168.1.121 [host down]
Nmap scan report for 192.168.1.122 [host down]
Nmap scan report for 192.168.1.123 [host down]
Nmap scan report for 192.168.1.124 [host down]
Nmap scan report for 192.168.1.125 [host down]
Nmap scan report for 192.168.1.126 [host down]
Nmap scan report for 192.168.1.127 [host down]
Nmap scan report for 192.168.1.128 [host down]
Nmap scan report for 192.168.1.129 [host down]
Nmap scan report for 192.168.1.130 [host down]
Nmap scan report for 192.168.1.131 [host down]
Nmap scan report for 192.168.1.132 [host down]
Nmap scan report for 192.168.1.133 [host down]
Nmap scan report for 192.168.1.134 [host down]
Nmap scan report for 192.168.1.135 [host down]
Nmap scan report for 192.168.1.136 [host down]
Nmap scan report for 192.168.1.137 [host down]
Nmap scan report for 192.168.1.138 [host down]
Nmap scan report for 192.168.1.139 [host down]
Nmap scan report for 192.168.1.140 [host down]
Nmap scan report for 192.168.1.141 [host down]
Nmap scan report for 192.168.1.142 [host down]
Nmap scan report for 192.168.1.143 [host down]
Nmap scan report for 192.168.1.144 [host down]
Nmap scan report for 192.168.1.145 [host down]
Nmap scan report for 192.168.1.146 [host down]
Nmap scan report for 192.168.1.147 [host down]
Nmap scan report for 192.168.1.148 [host down]
Nmap scan report for 192.168.1.149 [host down]
Nmap scan report for 192.168.1.150 [host down]
Nmap scan report for 192.168.1.151 [host down]
Nmap scan report for 192.168.1.152 [host down]
Nmap scan report for 192.168.1.153 [host down]
Nmap scan report for 192.168.1.154 [host down]
Nmap scan report for 192.168.1.155 [host down]
Nmap scan report for 192.168.1.156 [host down]
Nmap scan report for 192.168.1.157 [host down]
Nmap scan report for 192.168.1.158 [host down]
Nmap scan report for 192.168.1.160 [host down]
Nmap scan report for 192.168.1.161 [host down]
Nmap scan report for 192.168.1.162 [host down]
Nmap scan report for 192.168.1.163 [host down]
Nmap scan report for 192.168.1.164 [host down]
Nmap scan report for 192.168.1.165 [host down]
Nmap scan report for 192.168.1.166 [host down]
Nmap scan report for 192.168.1.167 [host down]
Nmap scan report for 192.168.1.168 [host down]
Nmap scan report for 192.168.1.169 [host down]
Nmap scan report for 192.168.1.170 [host down]
Nmap scan report for 192.168.1.171 [host down]
Nmap scan report for 192.168.1.172 [host down]
Nmap scan report for 192.168.1.173 [host down]
Nmap scan report for 192.168.1.174 [host down]
Nmap scan report for 192.168.1.175 [host down]
Nmap scan report for 192.168.1.176 [host down]
Nmap scan report for 192.168.1.177 [host down]
Nmap scan report for 192.168.1.178 [host down]
Nmap scan report for 192.168.1.179 [host down]
Nmap scan report for 192.168.1.180 [host down]
Nmap scan report for 192.168.1.181 [host down]
Nmap scan report for 192.168.1.182 [host down]
Nmap scan report for 192.168.1.183 [host down]
Nmap scan report for 192.168.1.184 [host down]
Nmap scan report for 192.168.1.185 [host down]
Nmap scan report for 192.168.1.186 [host down]
Nmap scan report for 192.168.1.187 [host down]
Nmap scan report for 192.168.1.188 [host down]
Nmap scan report for 192.168.1.189 [host down]
Nmap scan report for 192.168.1.190 [host down]
Nmap scan report for 192.168.1.191 [host down]
Nmap scan report for 192.168.1.192 [host down]
Nmap scan report for 192.168.1.193 [host down]
Nmap scan report for 192.168.1.194 [host down]
Nmap scan report for 192.168.1.195 [host down]
Nmap scan report for 192.168.1.196 [host down]
Nmap scan report for 192.168.1.197 [host down]
Nmap scan report for 192.168.1.198 [host down]
Nmap scan report for 192.168.1.199 [host down]
Nmap scan report for 192.168.1.200 [host down]
Nmap scan report for 192.168.1.201 [host down]
Nmap scan report for 192.168.1.202 [host down]
Nmap scan report for 192.168.1.203 [host down]
Nmap scan report for 192.168.1.204 [host down]
Nmap scan report for 192.168.1.205 [host down]
Nmap scan report for 192.168.1.206 [host down]
Nmap scan report for 192.168.1.207 [host down]
Nmap scan report for 192.168.1.208 [host down]
Nmap scan report for 192.168.1.209 [host down]
Nmap scan report for 192.168.1.210 [host down]
Nmap scan report for 192.168.1.211 [host down]
Nmap scan report for 192.168.1.212 [host down]
Nmap scan report for 192.168.1.213 [host down]
Nmap scan report for 192.168.1.214 [host down]
Nmap scan report for 192.168.1.215 [host down]
Nmap scan report for 192.168.1.216 [host down]
Nmap scan report for 192.168.1.217 [host down]
Nmap scan report for 192.168.1.218 [host down]
Nmap scan report for 192.168.1.219 [host down]
Nmap scan report for 192.168.1.220 [host down]
Nmap scan report for 192.168.1.221 [host down]
Nmap scan report for 192.168.1.222 [host down]
Nmap scan report for 192.168.1.223 [host down]
Nmap scan report for 192.168.1.224 [host down]
Nmap scan report for 192.168.1.225 [host down]
Nmap scan report for 192.168.1.226 [host down]
Nmap scan report for 192.168.1.227 [host down]
Nmap scan report for 192.168.1.228 [host down]
Nmap scan report for 192.168.1.229 [host down]
Nmap scan report for 192.168.1.230 [host down]
Nmap scan report for 192.168.1.231 [host down]
Nmap scan report for 192.168.1.232 [host down]
Nmap scan report for 192.168.1.233 [host down]
Nmap scan report for 192.168.1.234 [host down]
Nmap scan report for 192.168.1.235 [host down]
Nmap scan report for 192.168.1.236 [host down]
Nmap scan report for 192.168.1.237 [host down]
Nmap scan report for 192.168.1.238 [host down]
Nmap scan report for 192.168.1.239 [host down]
Nmap scan report for 192.168.1.240 [host down]
Nmap scan report for 192.168.1.241 [host down]
Nmap scan report for 192.168.1.242 [host down]
Nmap scan report for 192.168.1.243 [host down]
Nmap scan report for 192.168.1.244 [host down]
Nmap scan report for 192.168.1.245 [host down]
Nmap scan report for 192.168.1.246 [host down]
Nmap scan report for 192.168.1.247 [host down]
Nmap scan report for 192.168.1.248 [host down]
Nmap scan report for 192.168.1.249 [host down]
Nmap scan report for 192.168.1.250 [host down]
Nmap scan report for 192.168.1.251 [host down]
Nmap scan report for 192.168.1.252 [host down]
Nmap scan report for 192.168.1.253 [host down]
Nmap scan report for 192.168.1.254 [host down]
Nmap scan report for 192.168.1.255 [host down]
Initiating Connect Scan at 14:01
Scanning 3 hosts [1 port/host]
Completed Connect Scan at 14:01, 0.20s elapsed (3 total ports)
Initiating Service scan at 14:01
NSE: Script scanning 3 hosts.
Initiating NSE at 14:01
Completed NSE at 14:01, 0.00s elapsed
Initiating NSE at 14:01
Completed NSE at 14:01, 0.00s elapsed
Nmap scan report for SAC2V1K.lan (192.168.1.1)
Host is up (0.0051s latency).

PORT    STATE    SERVICE VERSION
631/tcp filtered ipp

Nmap scan report for anthony-OptiPlex-9010.lan (192.168.1.33)
Host is up (0.000076s latency).

PORT    STATE  SERVICE VERSION
631/tcp closed ipp

Nmap scan report for ANTHONY-s-S21-FE.lan (192.168.1.159)
Host is up (0.018s latency).

PORT    STATE  SERVICE VERSION
631/tcp closed ipp

Read data files from: /snap/nmap/3885/usr/bin/../share/nmap
Service detection performed. Please report any incorrect results at https://nmap.org/submit/ .
Nmap done: 256 IP addresses (3 hosts up) scanned in 5.78 seconds
anthony@anthony-OptiPlex-9010:~$
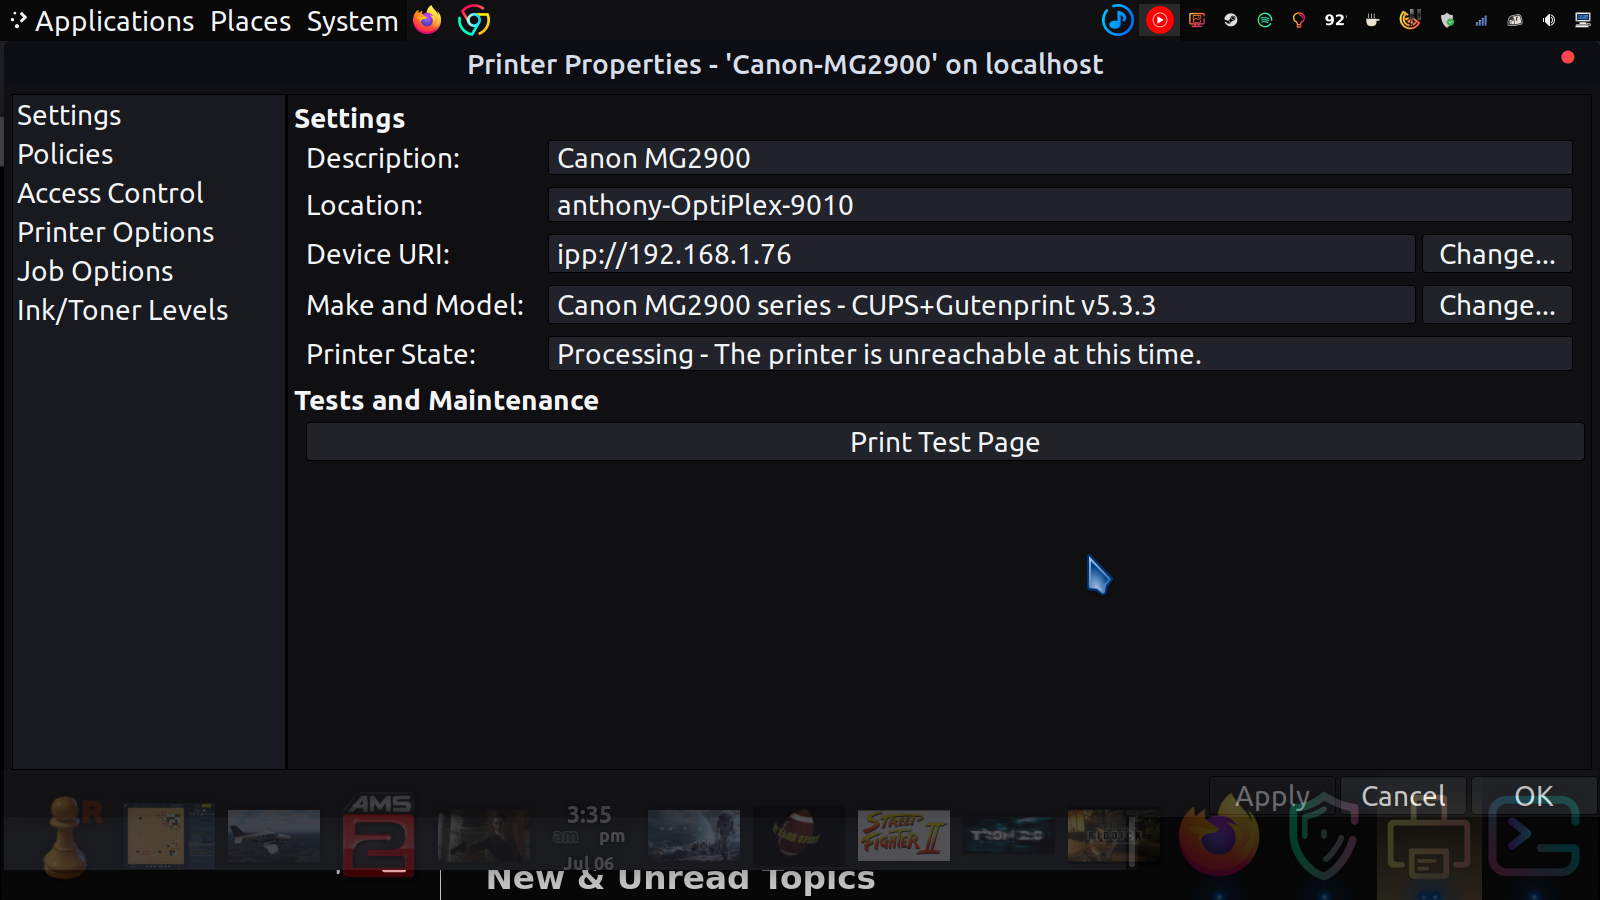
printer Canon-MG2900-series is idle.  enabled since Sun 06 Jul 2025 01:43:58 PM CDT
Canon-MG2900 accepting requests since Sun 06 Jul 2025 01:43:03 PM CDT
Canon-MG2900-series accepting requests since Sun 06 Jul 2025 01:43:58 PM CDT
MG2900-series accepting requests since Sun 06 Jul 2025 01:22:02 PM CDT
anthony@anthony-OptiPlex-9010:~$
I guess there's nothing more to be done--why does lpstat report as accepting requests? Guess I'll remove those Gufw rules for 631.
Thanks everybody.
You need a rule to allow out, as well as in, to close the communication loop, unless you have a rule that allows "related" links/streams to auto-open on a single "print session" basis.
I guess that leaves only the IJ Printer Driver package listed at the bottom of my previous posting.
Hope that finally resolves for you.
If you try to print a test page for the Printer Setup GUI panel, what errors do you get ?
Hi. For the first Gufw rule (allowing Out), I have the From entry field containing the computer's IP, the To field is the Printer's IP, both using TCP port 631.
For the second Gufw rule allowing In, I have the computer's IP in the From field, the To field contains the printer's IP. Both entries are using TCP port 631.
Sorry if I made dumb mistakes setting the rules--I have never messed with Gufw, other than to set it as Home.
anthony@anthony-OptiPlex-9010:~$ lpstat     -p Canon-MG2900 -a
printer Canon-MG2900 now printing Canon-MG2900-86.  enabled since Sun 06 Jul 2025 03:32:33 PM CDT
	Connecting to printer.
Canon-MG2900 accepting requests since Sun 06 Jul 2025 03:32:33 PM CDT
MG2900-series accepting requests since Sun 06 Jul 2025 03:29:32 PM CDT
anthony@anthony-OptiPlex-9010:~$
You need to reverse the positions for the IPs for allowing in. I also saw reference to other port numbers, so you need wildcard there for the printer.
IN    from   printer_ip     port  *
IN    to     computer_ip    port 631

OUT   from   computer_ip    port 631
OUT   to     printer_ip     port *
About the wildcarding--I found this on the internet:
How can I open a port with a wildcard? Would the following be correct?
sudo ufw allow 6443*
So can I just enter `sudo ufw allow printer_ip port *'
in the terminal, since Gufw doesn't deal with wildcards?
@ericmarceau These are the commands I entered by way of terminal--are they right?
sudo gufw allow IN from printers_ip port *
and
sudo gufw allow OUT to printers_ip port *
It looked like code in your last entry, so I copied it and replaced the IP numbers. I wish Gufw handled wildcards.
The port specification is to restrict, so not specifying a port implies all ports. ![]()
The actual command would simply be
sudo ufw allow printer_ip
It is best to use only ufw at command line. gufw is intended for GUI interraction only (gufw is a GUI wrapped around ufw, so inherits whatever is done with ufw).
I'm sure the ip is correct--the Spectrum android app reports on all devices connected to the network.
anthony@anthony-OptiPlex-9010:~$ sudo ufw allow 192.168.1.76
[sudo] password for anthony:
ERROR: Could not find a profile matching '192.168.1.76'
For the firewall settings, now I have:
Allow In computer_ip followed by printer_ip, both using tcp/631
Allow Out printer_ip followed by computer_ip, both using tcp/631
I have the "Home" selected as Profile
That might be too restrictive. When dealing with Vendor-supplied drivers, you can never predict which protocols they may feel they need to use. You should allow all protocols (not specify "TCP").
That could be because of dynamic IP for the printer, unless you programmed a fixed IP for that printer.
If you leave as dynamic, you will need to run a script at each boot to
Those should be (applying netmask to allow from any IP on captive LAN; 127.0.0.1 refers to localhost):
sudo   ufw allow   from 192.168.1.0/24        to 127.0.0.1 port 631

sudo   ufw allow   from 127.0.0.1 port 631    to 192.168.1.0/24
"24" is the usual range for LAN behind a router modem 0-255 => 256 addresses.
If you know that you have no need for IPv6 (usually commercial-tier bandwidth), you may wish to disable IPv6 networking altogether, until you ISP notifies you that they are shutting down IPv4 networking (somewhat distant future).
To do that you can turn it off during the boot in your GRUB configuration file by adding "ipv6.disable=1" to your parameter. My own parameter is as follows:
GRUB_CMDLINE_LINUX_DEFAULT="quiet splash ipv6.disable=1 scsi_mod.use_blk_mq=1 usb-storage.quirks=1058:25ee:u usbcore.autosuspend=-1"
Hi. These are the only two rules now:
sudo ufw allow from 192.168.1.0/24 to 127.0.0.1 port 631

sudo ufw allow from 127.0.0.1 port 631 to 192.168.1.0/24
Are both of these rules set to the two protocols? Gufw wouldn't let me edit the rule since it came from ufw. I'm thinking about calling Canon on Monday (I'll try Saturday) and let them tell me how to set a static IP for the printer--since it's Canon, I believe a poster was saying that Canon relies on the app, not the browser; the app doesn't ever connect. Thanks for all the help--we've been at this for a long while. Further information would be welcomed.
I was in error, believing that all protocols was the default. I apologize for that.
You need to update the previous pair of commands to the following:
(corrected:)
sudo ufw allow
-p allproto all from 192.168.1.0/24 to 127.0.0.1 port 631
sudo ufw allow-p allproto all from 127.0.0.1 port 631 to 192.168.1.0/24
Check your /etc/hosts file. If there is an entry for 127.0.1.1, then you should also add the following:
(corrected:)
sudo ufw allow
-p allproto all from 192.168.1.0/24 to 127.0.1.1 port 631
sudo ufw allow-p allproto all from 127.0.1.1 port 631 to 192.168.1.0/24
There are some more complex rules for managing the firewall, but if your primary focus is Gufw-focused, then I can't help you, and as you saw with my above mistake, I'm a bit rusty on the ufw side as well.
Going out on a limb here with a "wild" extrapolation ...
What do you get if you enter the following in the address bar of your browser, with your printer powered-up?
http://Canon%20MG2900%20series._ipp._tcp.local:631
This idea taken from the following:
That same article says that if you have avahi running, then the following might give you some additional insights:
avahi-browse -acr
Hi. Just hoping the token is simply a typo. The web address gave me a webpage where the AI gave me a lot of information--customer's had mixed reviews with this printer. My phone now prints from the Canon, so one form of wireless is good, now if I can get this desktop to print wirelessly.
Some felt it was good for the price; the earliest Windows version to work with this model was Windows Vista. I'll still call Canon, maybe just buy a new wireless printer from Amazon--I'm a Prime member and might find a deal. Thanks.
anthony@anthony-OptiPlex-9010:~$ sudo ufw allow -p all from 192.168.1.0/24 to 127.0.0.1 port 631
[sudo] password for anthony:
ERROR: Invalid token '-p'
anthony@anthony-OptiPlex-9010:~$ sudo ufw allow -p all from 127.0.0.1 port 631 to 192.168.1.0/24
ERROR: Invalid token '-p'
anthony@anthony-OptiPlex-9010:~$ sudo ufw allow -p all from 192.168.1.0/24 to 127.0.1.1 port 631
[sudo] password for anthony:
ERROR: Invalid token '-p'
anthony@anthony-OptiPlex-9010:~$ sudo ufw allow -p all from 127.0.1.1 port 631 to 192.168.1.0/24
ERROR: Invalid token '-p'
anthony@anthony-OptiPlex-9010:~$
Hi, @Anthony_Craig (and @ericmarceau ) ![]()
@Anthony_Craig : What is the output that you get when you run the following command?
sudo ufw status verbose
I think @ericmarceau got slightly confused with the "ufw" commands syntax (hey, it happens to the best of us! ![]() ). Specifically, the "-p all" relates to "iptables" commands and NOT to "ufw" commands. In the "UFW" ("Uncomplicated Firewall") web page in the "Community Help Wiki" of the "help.ubuntu.com" web site ("Official Ubuntu Documentation"), it is stated that if we omit the protocol in "ufw" commands, it assumes the command is meant to apply for both TCP and UDP:
). Specifically, the "-p all" relates to "iptables" commands and NOT to "ufw" commands. In the "UFW" ("Uncomplicated Firewall") web page in the "Community Help Wiki" of the "help.ubuntu.com" web site ("Official Ubuntu Documentation"), it is stated that if we omit the protocol in "ufw" commands, it assumes the command is meant to apply for both TCP and UDP:
Hi, all. The printer can now print from my phone and desktop as well. Thanks for being so patient with this issue (and so many posts)--have a good day.
Again, sorry for the confusion between ufw and iptables. Those should have been
sudo   ufw allow   proto all   from 192.168.1.0/24        to 127.0.0.1 port 631

sudo   ufw allow   proto all   from 127.0.0.1 port 631    to 192.168.1.0/24
sudo   ufw allow   proto all   from 192.168.1.0/24        to 127.0.1.1 port 631

sudo   ufw allow   proto all   from 127.0.1.1 port 631    to 192.168.1.0/24
@ericmarceau Absolutely no problem--the last time I checked, the printer printed from both my phone and the networked desktop. Thanks for the great help to get it to network printer status, as it's built to be.
Thank you for marking my earlier response as the solution.
To clarify for others, which of the 4 suggestions got you to that working state:
ufw commands,Thank you.