Hi Guys, let's perform a Mate Ubuntu installation on a micro SD card. I like Micro SD cards better than pendrives. They take up little space, withstand blows, you can step on them, they can get wet, and endure much higher and lower temperatures and excessive electromagnetic radioactivity.
The micro SD cards have many options, you use in mobiles, MP4, photo camera, video camera and with a card reader you can listen to music in the car or a portable player, you can store additional information to take with you, and put in them an operating system like Ubuntu Mate.
I have used Ubuntu since 2008 and I have done this many times, with Linux Mint Mate, Ubuntu 14.04, Ubuntu Mate 14.04 and now Ubuntu Mate 16.04; I always follow the same pattern and works phenomenal.
1 / Get a 64 Gb Micro SD Card (recommended size) from a good brand, which assures you it will last for a long time. Sony, Samsung, Toshiba, etc. ....
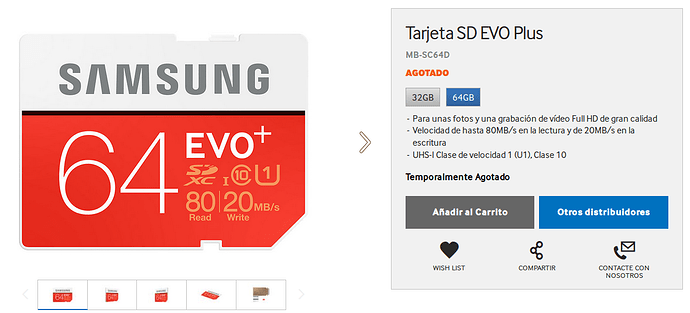
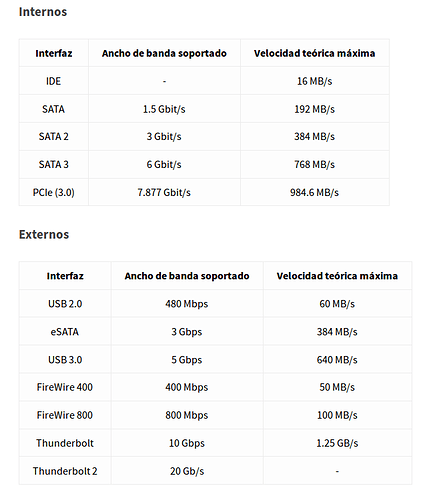
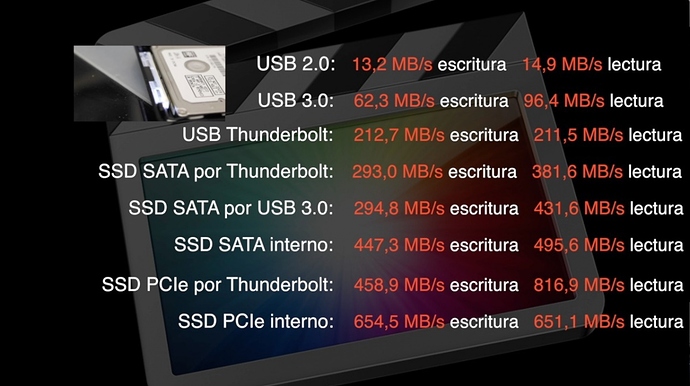
The card must have good reading and writing speed. I have long used a Samsung EVO card with 48 Mb/sec read and 15 MB/sec write and it has been sufficient for normal operation. But if you can have one with more speed all the better. I now have Ubuntu Mate on a Samsung EVO plus 80 MB/sec read and 20MB/sec write. With a USB2 port you can have speed up to 60 Mb/sec, and 600 Mb/sec if you have a USB3, but there is no Micro SD that fast.
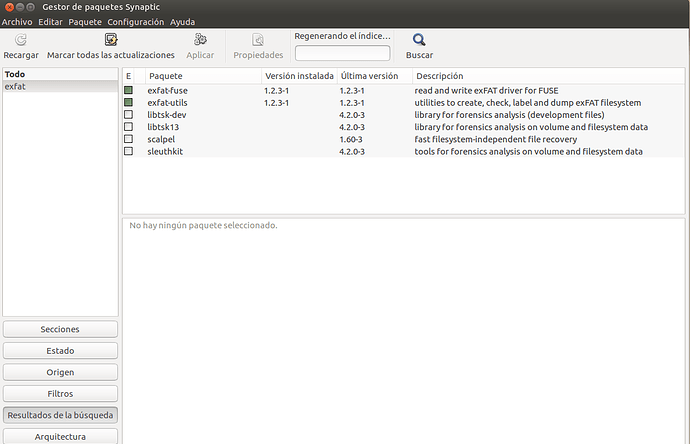
If you are using Ubuntu remember that you have to have installed the packages needed for ExFAT.
If it does not recognize the ExFAT file on the 64 GB SD card, open Synaptic and click on search ExFAT. You will see the required packages you need to install Exfat, Exfat-fuse and Exfat-utils.
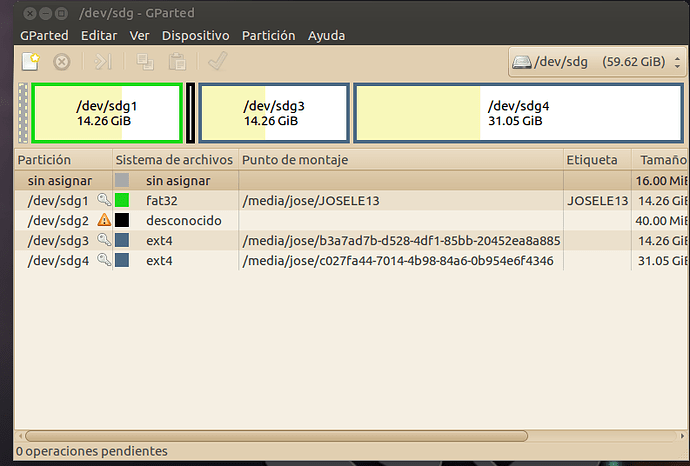
In Mate Ubuntu they come already installed. It is better to make the partition with Gparted before installing, afterwards you configure it during the OS installation. With Gparted you can leave the initial 16Mb Unassigned and go step 3/.
2 / We will setup the Micro Sd card with the Ubuntu ISO 32-bit. We will use 32 bits because this way you will be able to use it in 32 and 64 bits computers. Your computer must have a 32-bit CPU for proper installation, and any OS installed so that the Grub can detect multiple systems.
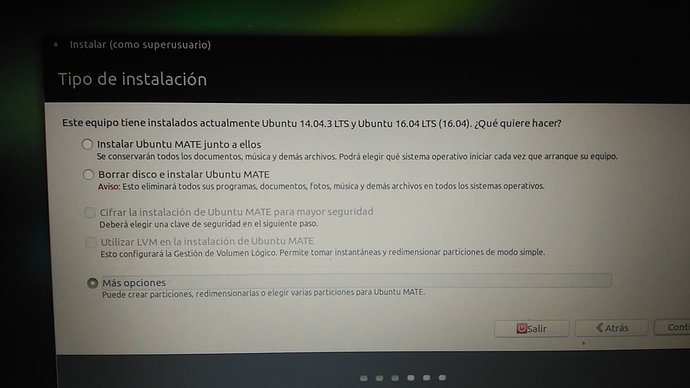
Continue with usual setup steps, Make the installation without Internet connection. It will take too long, and you will have time to update later. When prompted how to install, it says “More options” below. Click there.
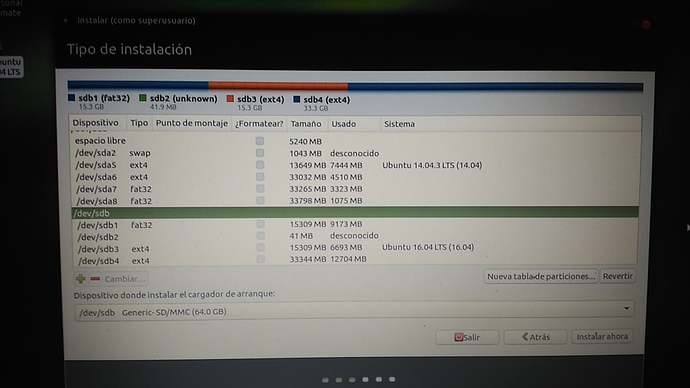
Doing the partitions, you select the partitions of 16 Gb and 32 GB that must be formatted. In the first partition it will prompt “Format now?” You do not do it now, so you press the back button, because everything is formatted at the end of the selections, and you select INSTALL NOW.
3rd / To make partition and format the MicroSd card we will do as follows:
- For the first 16Mb, we leave UNASSIGNED, as it is close to the start of the card area.
- For the next 16 Gb, this partition is formatted in FAT32. This partition will be multi-purpose, it can be used to put information you can share with computers, mobile, camera, video cameras, car radio-cd (it can read the music that you store) and other devices. When you start Mate Ubuntu from your Micro SD card it will recognize this partition as external storage. This will be so only with Ubuntu, if you install Linux Mint it will not recognize this partition. You can name this partition so you recognize it when connected to the computer.
- For the next 40 Mb, you let this partition as UNKNOWN. This is important as Android mobiles
will not accept Ext4 files from SD cards. If it ever detects it, you will never use the 16 GB partition on the Android mobile. This is to separate FAT32 partition from the Ext4. - Next 16 Gb partition is formatted in Ext4. This one is to install the operating system. It is likely that 10 or 12 Gb may be enough though.
- Then the rest will be approximately 32 Gb and this partition is formatted in Ext4. It will be used to put the home. This area is your personal folder and your desktop,
- Swap. This partition is not installed, because the Micro SD card does not support such
data transfer speed. Removing SWAP, RAM memory will perform all the work.
IMPORTANT: Do not forget that when you finish the installation you need to disable the system hibernation and suspension, because if it enters standby it will not work and then you have to shut down your computer and restart. We have no Swap.
You will find next where the boot loader is to be installed. You must put the start of Micro SD card. In my case / deb / sdb Generic-SD / MMC (64.0 Gb)
And then you press INSTALL, and all the changes will apply. It will make the partitions, format the microSD card and begin with the installation of Ubuntu Mate.
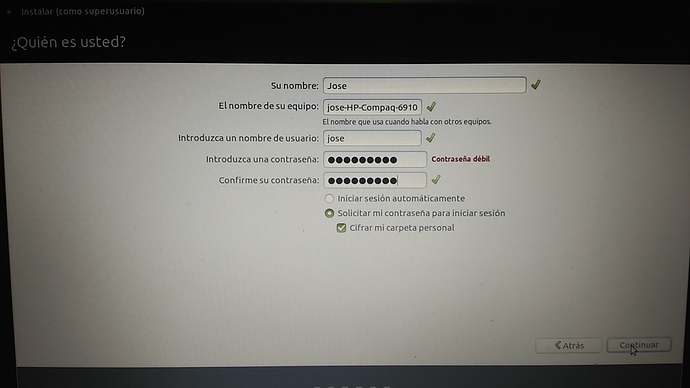
Next it will ask for Username, machine name, and Password
- I recommend to put user password and encrypt the home, so you can keep secure what is important to you and you do not want to see anyone and can always carry with you. If you lose the microSD card no one can access it, the information is safe; but a card is not fail proof, it will last a long time but not for all of your life, so you must have backup on an external disk.
4 / Once the installation is complete you must have your computer's BIOS configured to boot first from USB, then from CD and then Hard Disk.
Booting Ubuntu from your Micro Sd card usually takes about 45 seconds on the computer where you made the installation, but on another computer it will be about 3 minutes and 30 seconds, like when you boot an ISO image, so you should be patient.
Turning off Ubuntu takes 5 seconds or less.
You already have portable Ubuntu Mate, to use on any computer, carry what is important with you, use it with other devices, and taking up little space.
I hope I was not wrong in any explanation, and hope that you enjoy it.
Regards...
