So I gave up and went to Terminal and it crashed out on an error.
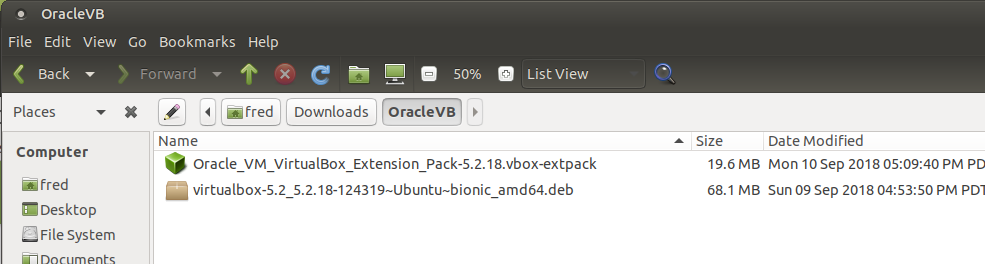
fred@fred-Lenovo-G780:~$ sudo dpkg -i /home/fred/Downloads/VirtualBoxExtension/Oracle_VM_VirtualBox_Extension_Pack-5.2.18.vbox-extpack
dpkg-deb: error: '/home/fred/Downloads/VirtualBoxExtension/Oracle_VM_VirtualBox_Extension_Pack-5.2.18.vbox-extpack' is not a Debian format archive
dpkg: error processing archive /home/fred/Downloads/VirtualBoxExtension/Oracle_VM_VirtualBox_Extension_Pack-5.2.18.vbox-extpack (--install):
dpkg-deb --control subprocess returned error exit status 2
Errors were encountered while processing:
/home/fred/Downloads/VirtualBoxExtension/Oracle_VM_VirtualBox_Extension_Pack-5.2.18.vbox-extpack
fred@fred-Lenovo-G780:~$
Also tried this in Terminal:
fred@fred-Lenovo-G780:~$ sudo apt-get install virtual-ext-pack
[sudo] password for fred:
Reading package lists... Done
Building dependency tree
Reading state information... Done
E: Unable to locate package virtual-ext-pack
fred@fred-Lenovo-G780:~$
I don't know what program to use to install the extension pack.
Where oh where have I gone astray?
Oracle doesn't make this easy.
Thanks, Fred
Fred, I think that you should open VirtualBox and install the extension pack there. I haven’t used Vbox in years and years but I recall the installation of the extension pack. Good luck Fred
I've also just upgraded from 16.04 to 18.04. There were more problems to work around than I remember in previous Ubuntu / Ubuntu-Mate upgrades - or that might just be my memory being selective.
Anyway, back to your imediate concern - Virtual Box.
I have just installed this and it works fine.
Install Virtual Box from the software boutique.
Install your "guest" operating system, then shut it down.
In the Virtual Box main window select the menu "Help" and the item "Virtualbox Website..."
From the Downloads section download the "Virtualbox Guest Additions" and install them directly.
Want to add a "shared" folder? This post should help you:
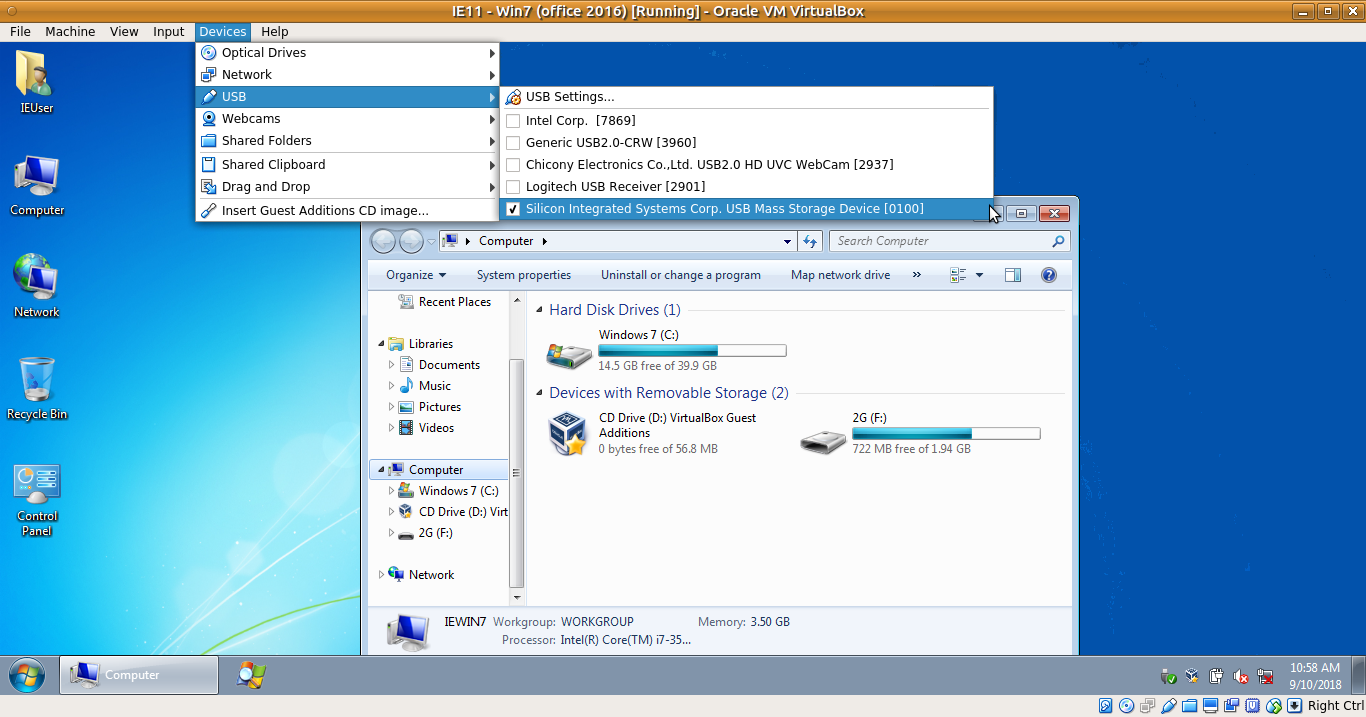
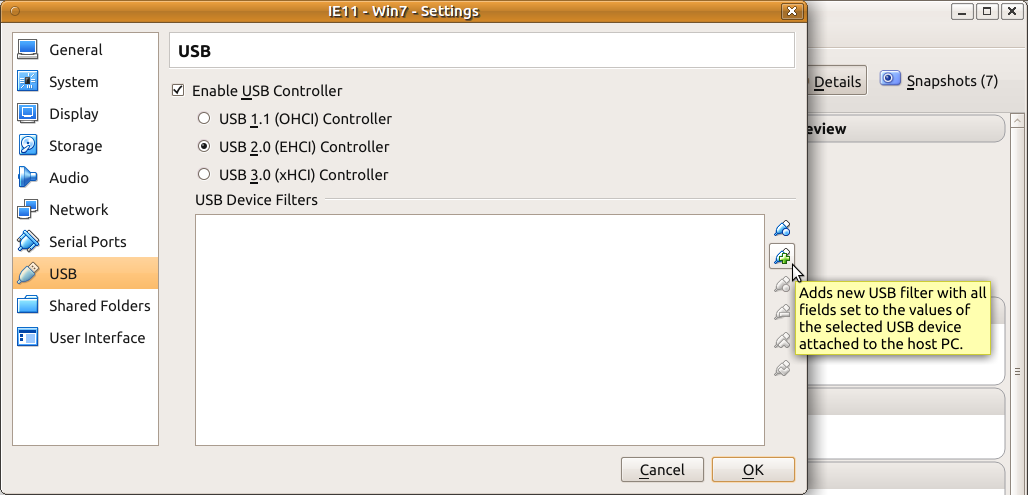
I followed everything and it seemed like it did nothing the second time I did the install as a normal user. But more importantly I learned that you can't use USB 3.0.
I dropped back to USB 2 and when I brought up W7 pro 64bit it claimed my software had in stalled successfully. Yet when I went to the devices toolbar at the very bottom it shows "No USB Devices Attached". Here is a screen shot showing BB found it, but W7 doesn't.
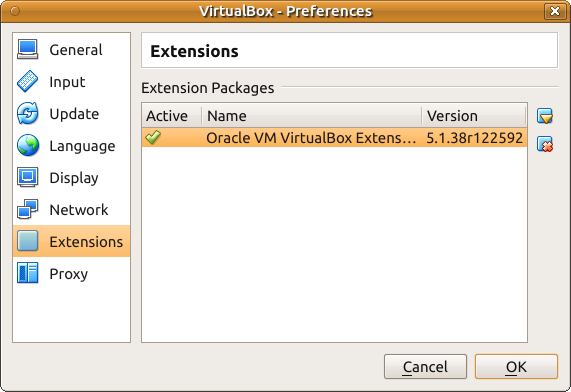
I can confirm your issue with my Windows 7 VM (UM 16.04 LTS as host with VirtualBox 5.1.38).
It does not see host’s USB thumb drive while using USB 3 controller in VM.
But when guest is Ubuntu, then thumb drive is visible on both USB 3.0 and USB 2.0 virtual adapters.
So for Windows we should use USB 2.0 virtual controller.
Above is the line that solved it.
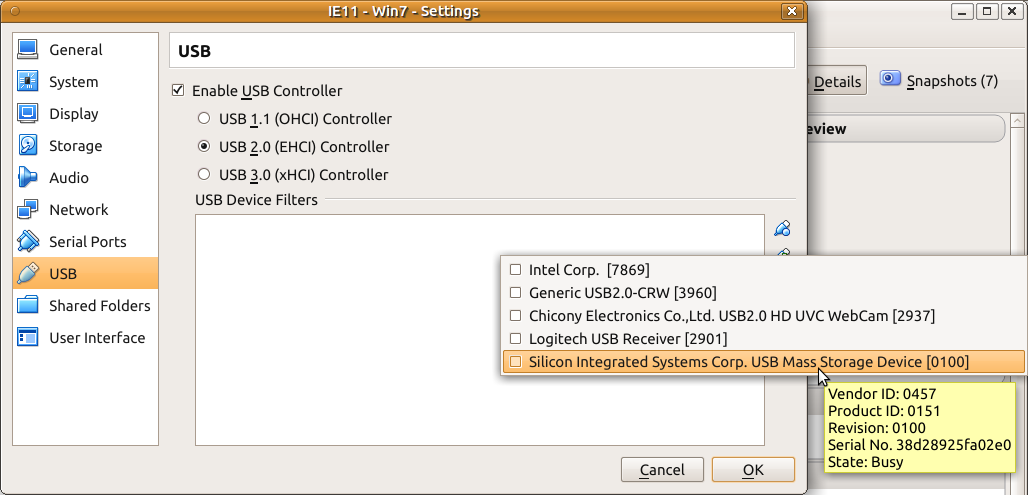
But it doesn't automatically find it, I have to go to Devices and force it.
We are running two different versions, I have VB 5.2.18.... so our screens are a little different.
But more importantly if I remember right under 16.04 and your version it found the USB drives just fine.
I have either missed something else or they have a bug in the VB software.
Are you running 18.04 or 16.04, just curious?
I don't remember it being this hard in 16.04 and VB 5.1.38
Just tried that and from what I can tell if you plug in a new USB device you have to do the device setting trick.
No that anything is wrong with that, but am I correct?
I like to understand how things work.
To install Guest Sdditions inside a Windows VM, just “insert” the guest additions ISO from the “Devices” menu. Then install in the manner you would normally install in Windows. Then reboot the VM.
The most efficient way I have found to install Guest Additions inside any Debian based VM is the following:
Boot and log-in to the vm
Open a terminal and type
sudo apt-get install dkms
(If it is already installed, you will get a message telling you so. In which case, fine).
Insert the guest additions ISO via the “devices” menu
Ignore/close any device dialog boxes/menus that come up on screen
Open the file manager and navigate to the guest additions iso. Once, there, copy the address out of the address bar.
Open a terminal and type “cd” followed by the pasted contents (to paste into a terminal, press CTRL/SHIFT/v) of the clipboard and then press “Enter”. You will now be inside the guest additions folder. Type “ls” and you will see the contents of the folder. You will note one of the files is called “VBoxLinuxAdditions.run”.
My main problem now is that the VB doesn't really resize quite right. Windows only offers 4:3 settings.
I might be to picky, but I thought the older VB sized properly. I didn't use it that much so I might be mistaken.
Thanks to everybody for getting me to this point.
I am trying very hard to convert.
You may not know this... so I will assume that you don't.
Caja can display the "path" to the open directory (folder) in two ways. The first is often called "breadcrumbs" - this is what your screenshot shows [fred] [Downloads] [OracleVB].
The second shows the path as you would see it in a terminal e.g. /fred/Downloads/OracleVB. To make this second style visible simply click on the "pencil" icon at the left hand side of the "breadcrumbs"-style path. In fact by repeatedly clicking on the pencil icon you can toggle back and forth between the two display styles.
If you already knew this my appologies, otherwise I hope it has helped you.
If you want to find out more about Caja you may find this resource useful:
Fred. I was referring to the file manager inside the running VM.
See Alpine John’s explanation of how to show the address bar.
The way to “insert” the guest additions ISO into the VM virtual CD drive is by going to the virtual box menu of the running VM and selecting Devices/Insert Guest Additions CD Image
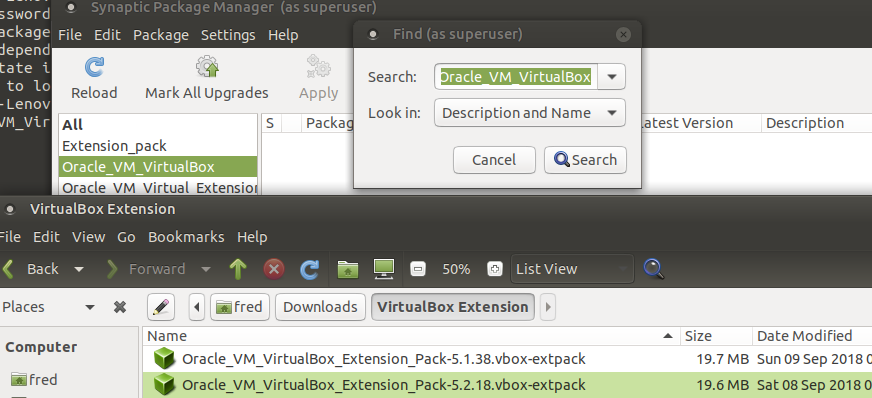


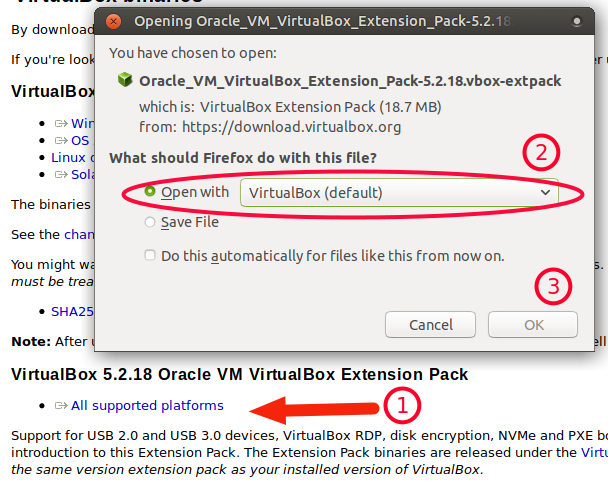
 you are downloading the same version as me.