If you've accidentally deleted a precious  file ,
  photo,
  folder or you regret emptying the wastebasket, you may still be able to get it back!
Typically, deleting a file only marks it as "free" on the disk, but the data isn't actually gone. Chances of success will depend if you've been writing too much to the disk in the meantime. In fact, if you're using the computer with the lost files right now, take precaution! 
A few pointers before we begin:
 SSDs and flash memory stores files differently compared to the conventional hard drive, chances of recovering files intact will be very low, but not impossible.
 This tutorial also applies to other distros, not just Ubuntu MATE.
 To avoid corrupting the lost files while the system is in use, consider booting from a live CD or USB.
If the hard drive is damaged or experiencing serve corruption, software recovery may not be the solution.
Last one, a disclaimer: This tutorial is for informational purposes only. While it has helped me recover lost data in the past, I cannot guarantee the same success for you. Proceed at your own risk!
We'll be using a utility called testdisk, released under the GPL and is available from the Ubuntu repositories.
First, open up the terminal (CTRL+ALT+T) and install the package:
sudo apt-get update
sudo apt-get install testdisk
Then, start testdisk.
sudo testdisk
(1) It's up to you if you wish to keep a log:

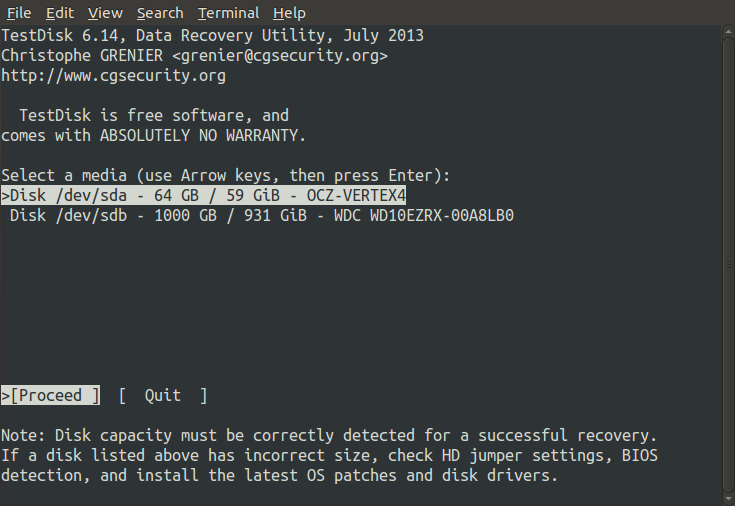
(2) Choose the drive you wish to recover files from:
(3) testdisk will identify the partition table automatically, check that it's the right one, and continue:

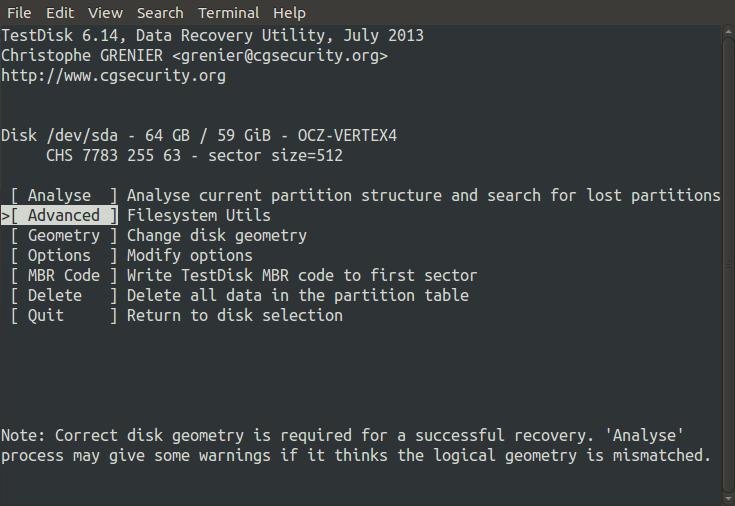
(4) Choose Advanced, as this will provide the tool to undelete your lost files.
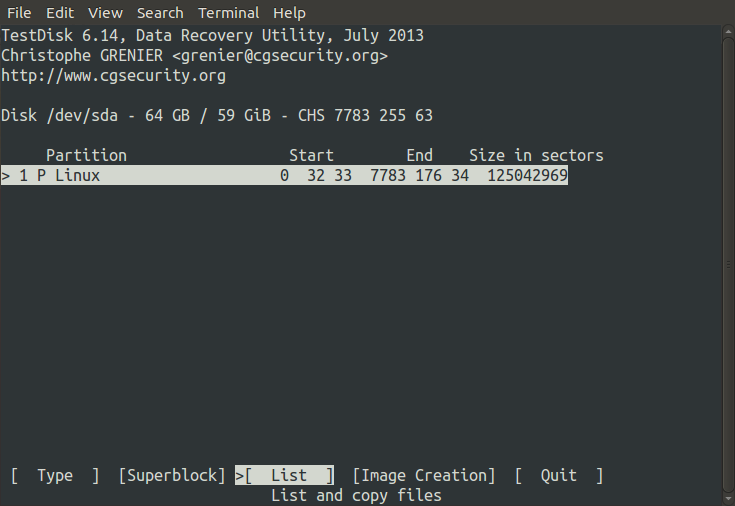
(5) Now pick the partition and choose List.
My drive here just contains one, but a dual boot system would have multiple.
(6) Navigate through the paths until you reach the directory you wish to recover.
In this example, I'm inside /usr/share (originally used for recovery for this post)
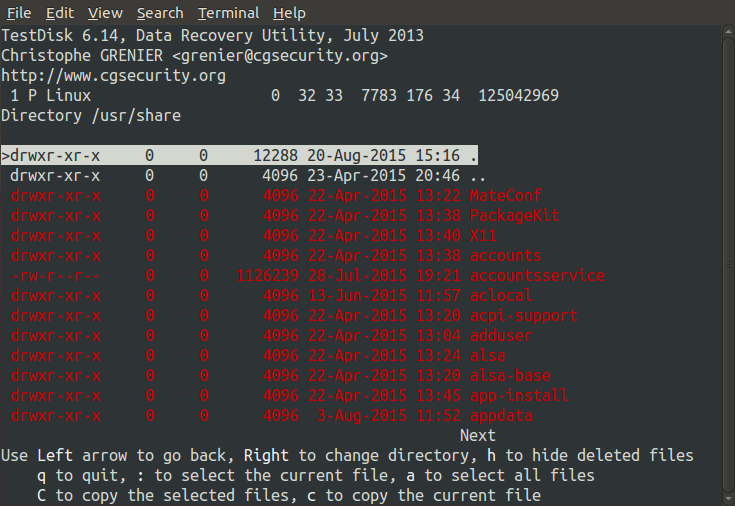
The red shows a file/directory that has been previously deleted. You can press A to select all or . to select individual files.
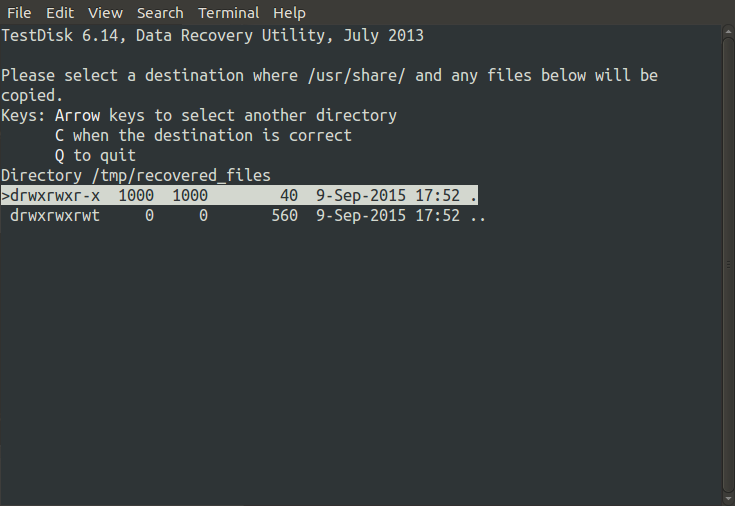
Once you've finished making your selections, press C to copy, and choose the directory to save these files to.
Note the file sizes, if you wasn't expecting a file to be 0 or 4096, chances are the file has been overwritten and won't be fully intact, but the partition still knows a file use to be here.
In this example, I'll be saving to /tmp/recovered_files. Press C to confirm the destination.
You'll now need another storage device to copy these files onto. It's a bad idea to copy from the source back to the destination as this would overwrite the free space! Potentially causing the recovery to fail if it's the same sectors where your deleted files are.
If you're running a live session and have lots of RAM, you may be able to get away with saving to the live session's desktop (which uses the available RAM), particularly if the files are small.
Afterwards, if all recovers well, you can move/copy these files back to where they belong, and take care next time with your files. 

Good luck! 