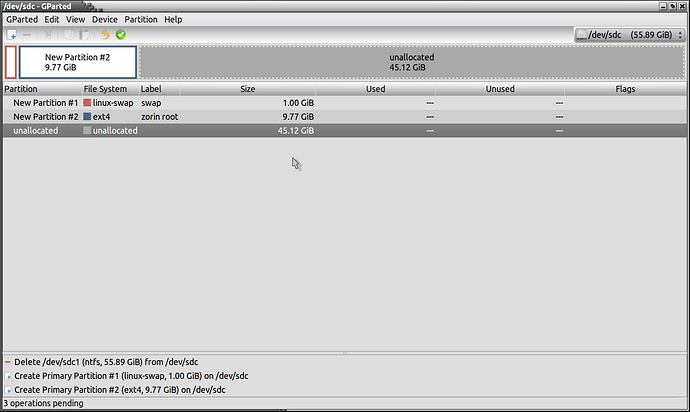
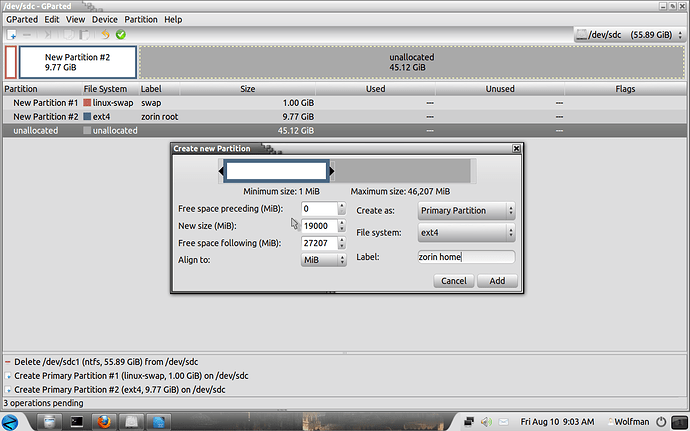
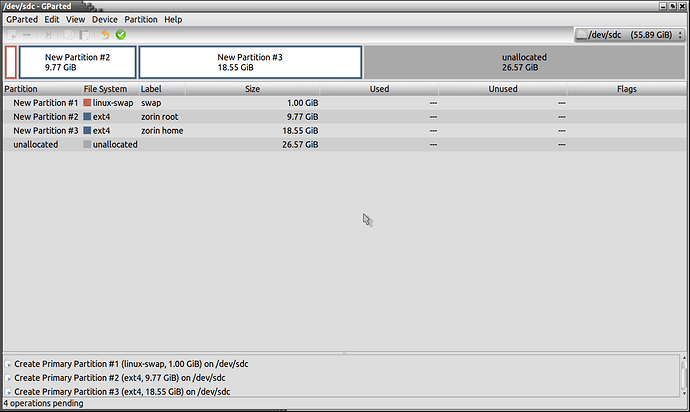
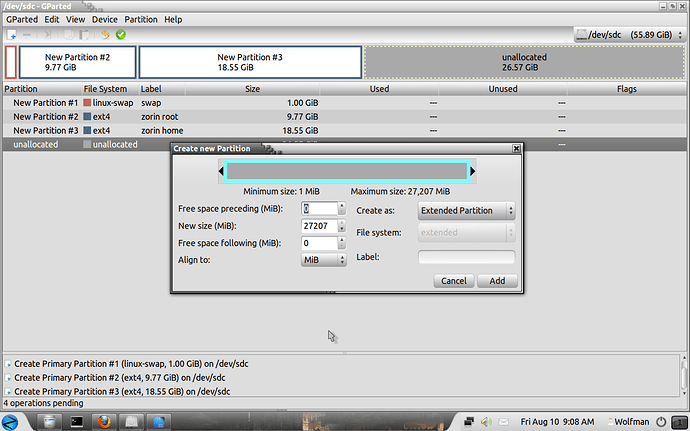
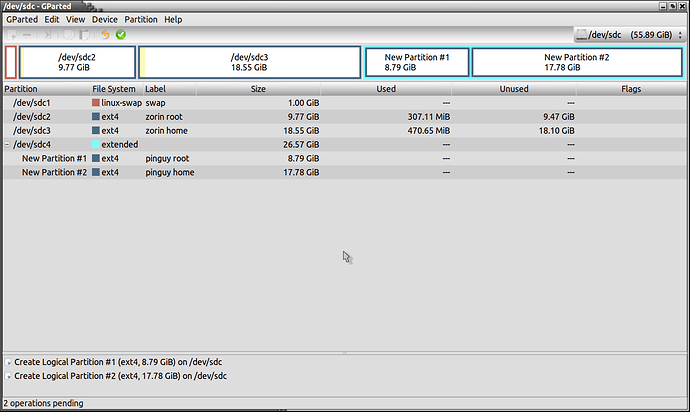
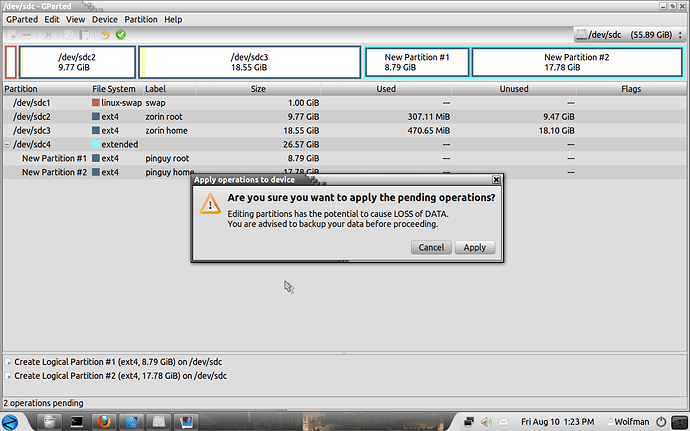
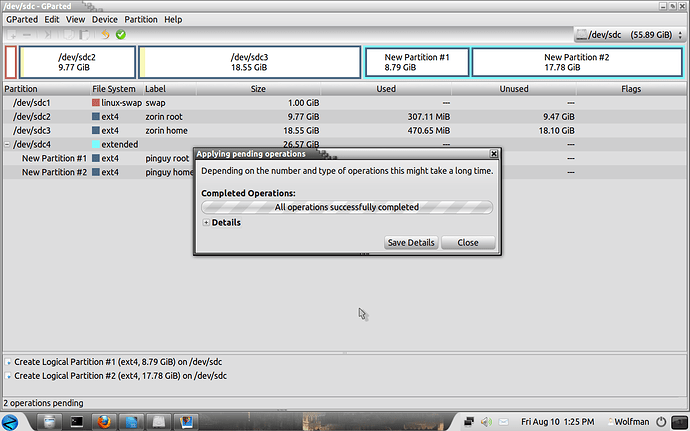
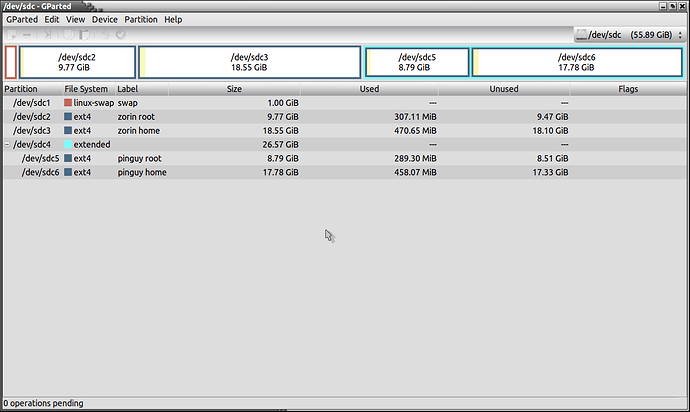
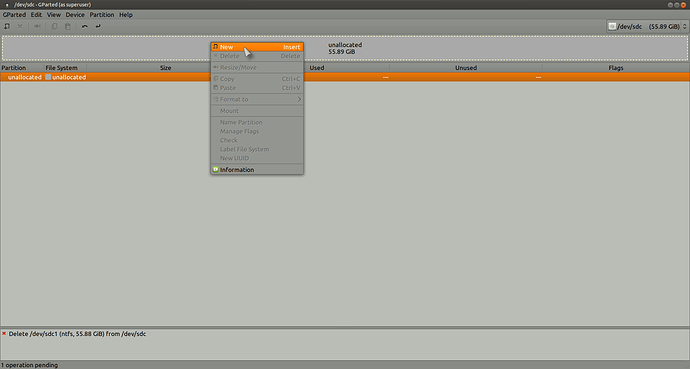
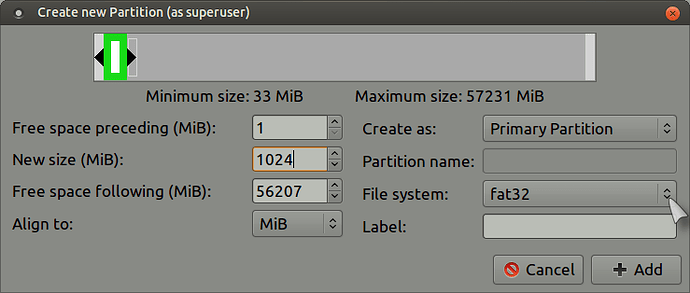
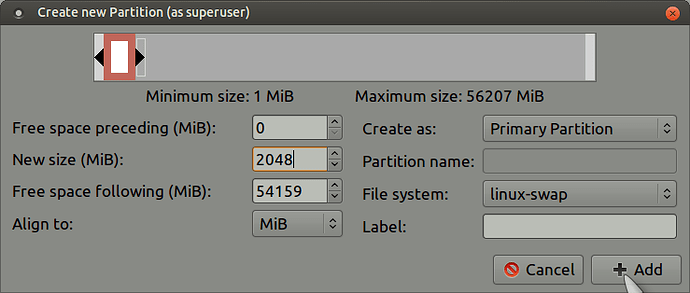
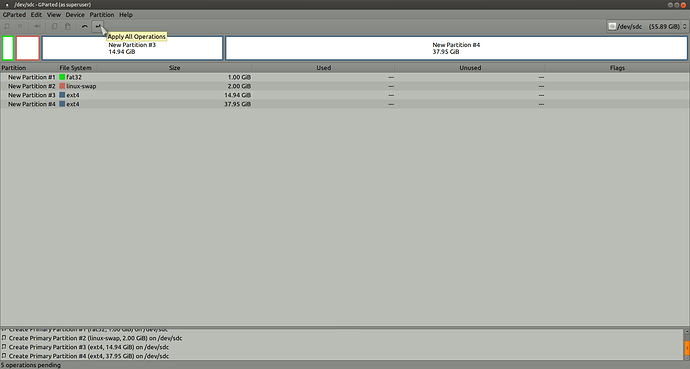
PLEASE NOTE: THIS GUIDE DOES NOT DEPICT THE INSTALLATION (CREATION) OF A UEFI PARTITION. IF YOU HAVE A COMPUTER WITH UEFI/BIOS, MAKE SURE YOU ALSO CREATE A UEFI/BIOS PARTITION AS WELL. SEE FURTHER REMARKS ABOUT UEFI PARTITIONS IN THE GUIDE!.
Linux beginners should also look here:
You can only partition on an unmounted drive using an installation disk of your Linux flavour with a partitioning tool included, use the Gparted tool in live mode, or you can download a copy of Gparted from the link below and create your own Gparted disk:
WARNING BEFORE YOU START TO PARTITION YOUR DRIVE:
MAKE SURE YOU DEFRAGMENT YOUR WINDOWS DRIVE BEFORE YOU START RESIZING THE WINDOWS PARTITION AS IT MAY WELL LEAD TO DATA LOSS.
MAKE SURE YOU HAVE ENOUGH SPACE LEFT ON YOUR WINDOWS DRIVE TO INSTALL MORE APPS AND FILES AND YOU LEAVE ENOUGH SPACE FOR THE OPERATING SYSTEM TO MOVE AROUND A BIT.
BACKUP ALL YOUR DATA ON AN EXTERNAL DRIVE OR OTHER MEDIUM IN CASE THINGS GO WRONG.
IF YOU DO NOT HAVE YOUR WINDOWS RECOVERY DISK SET ALREADY MADE, STOP NOW AND CREATE A RECOVERY DISK SET BEFORE YOU CONTINUE. SOME PC'S HAVE A DISK SET AND SOME DON'T, PLEASE CHECK!!!!!!!!!. SOME PC'S ONLY HAVE A RECOVERY PARTITION, IF YOU ERASE THAT PARTITION, YOU WON'T HAVE WINDOWS ANY MORE SO PLEASE REMEMBER THAT!!!!!.
USE THIS GUIDE AT YOUR OWN RISK, I WILL NOT BE HELD RESPONSIBLE FOR ANY DAMAGE TO YOUR PC OR LOSS OF DATA.
Important: People with UEFI installed on their PC should look here first!:
Ubuntu partition guide:
To install on an external drive, see this link (this is for Ubuntu 13.10 but the same rules apply):
Mac users, please read this:
This guide is in four parts.
Part 1: Install Linux alongside Windows.
Part 2: Remove Linux and return to windows.
Part 3: Linux Returns. (Completely remove Windows and only use Linux with a double setup)
Part 4: UEFI systems
Part 1:
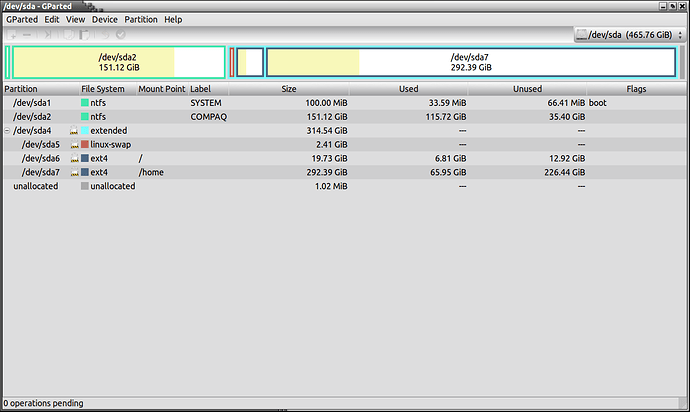
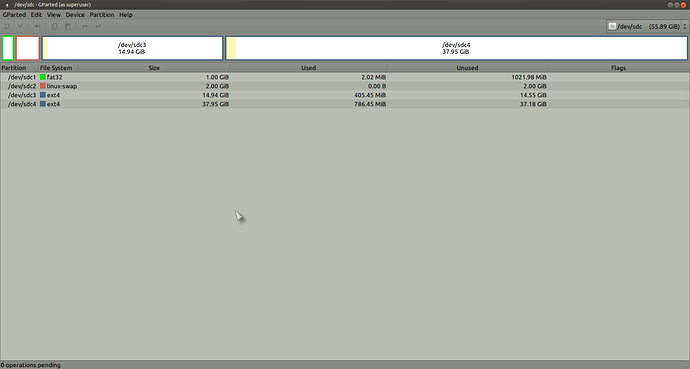
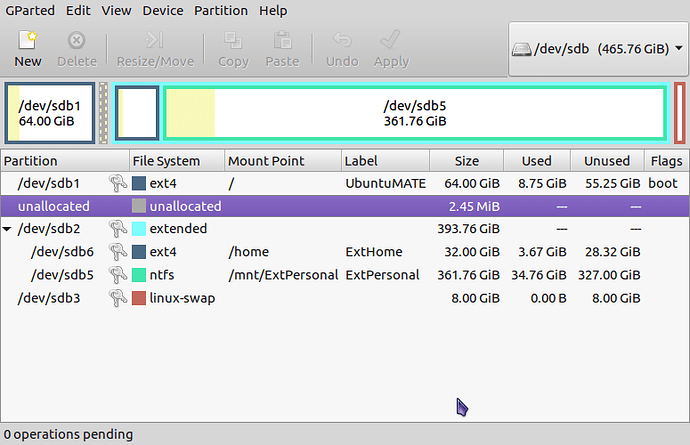
The first pic is of my normal desktop hard drive layout (old pic) which if you look to the top right, it tells you which drive you are looking at, in this case; it is drive /dev/sda.
Pic 1:
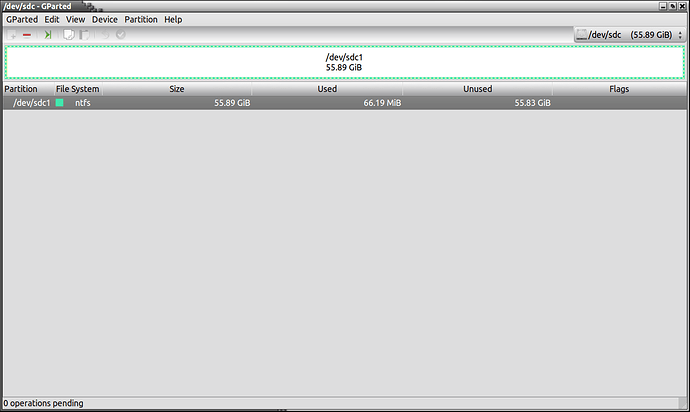
The second pic is of my external drive which I am going to use for this tutorial, it is labelled /dev/sdc. As you can see from this pic, it is formatted to the “NTFS” format which is normal for Windows XP/2000/Vista/Windows7.
Pic 2:
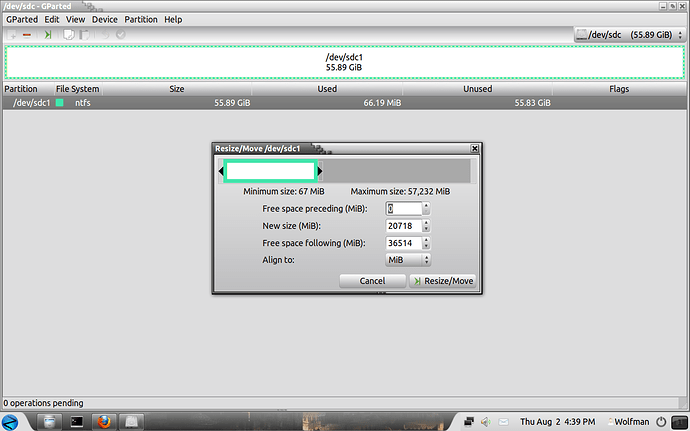
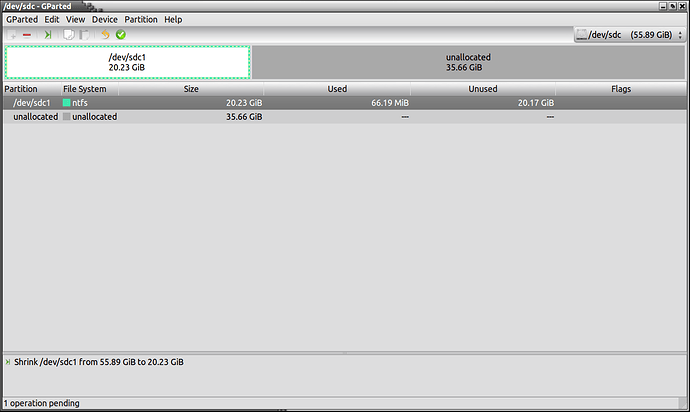
Now, lets resize our Windows partition so we can create our 3 Linux partitions. Right click on the box where it states “/dev/sdc1-55.89Gib” and then on “Resize/Move”, then you simply need to enter the amount of megabytes you would like your new partition size to be, in this case, I have put 20000, which is roughly 20GB, then click the button which states “Resize/Move” and you will now have a smaller partition on the left, and a blank space on the right.
(1GB is 1024MB)(1TB is 1024GB) I just rounded it off to a 1000.
Pic 3:
Now you have unallocated space on the right which is where we are going to create an “Extended Partition”, within this partition, we will create our 3 Linux partitions.
Pic 4:
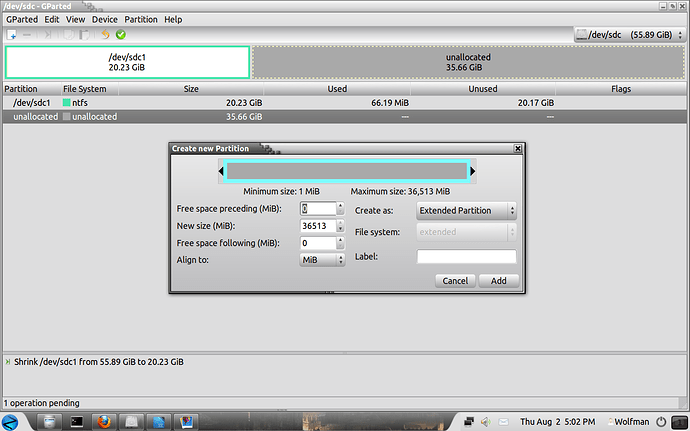
Right click in the unallocated space box on the right and then on “New”, a menu will pop up, where it says “Create as”, we need to select “Extended partition” from the drop down list and then on “Add”. You do not need to put in the amount of MB's at the moment as we need the whole of the empty space in the extended partition.
Pic 5:
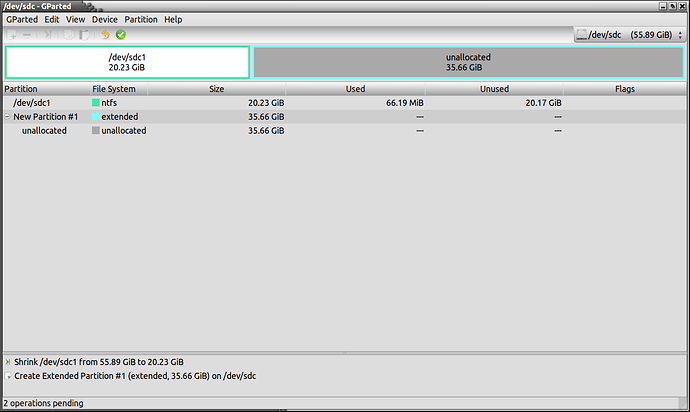
Once you have selected “Add”, your gparted workspace will look like this and you will notice that the unallocated space box; now has a blue border.
Pic 6:
Now we will create out 3 Linux partitions in the unallocated space with the extended partition.
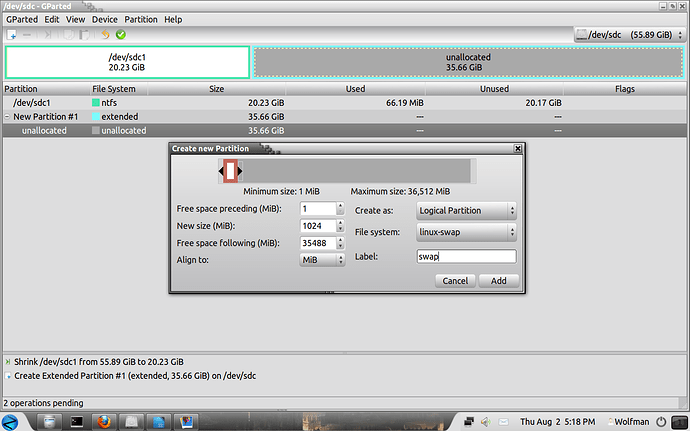
First of all we will create a “Swap” partition. Right click within the box and “New”, type in 1024 in the “New size” section, to the right of that is “File System” which you need to select “linux-swap”, where it says “Create as:”, leave it at “Logical Partition”. Click on “Add when finished.
(WHAT WE HAVE DONE IS TO CREATE A SWAP PARTITION WHICH WILL SUPPORT THE PC'S MEMORY AND IT SHOULD BE ABOUT TWICE THE SIZE OF YOUR PC'S RAM. I HAVE CHOOSEN 1GB =1024MB FOR THE PURPOSE OF THIS DEMO)
I have also given the partition a label, you should do this with all the Linux partitions, if you don't want to, it is up to you!.
Pic 7:
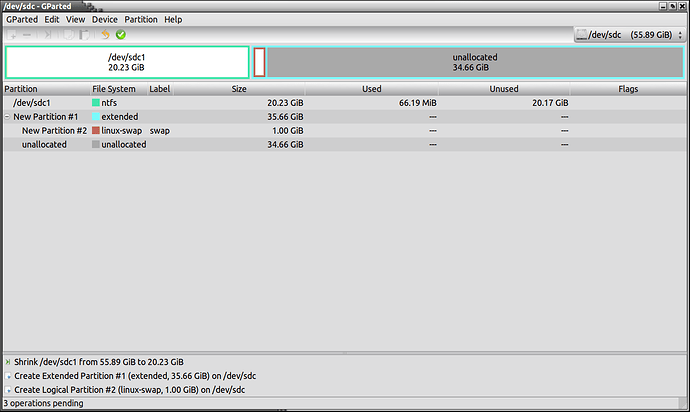
Now you have created your swap partition, you should have this in front of you.
Pic 8:
Now we will use the rest of the space for our “root” and “home” partitions.
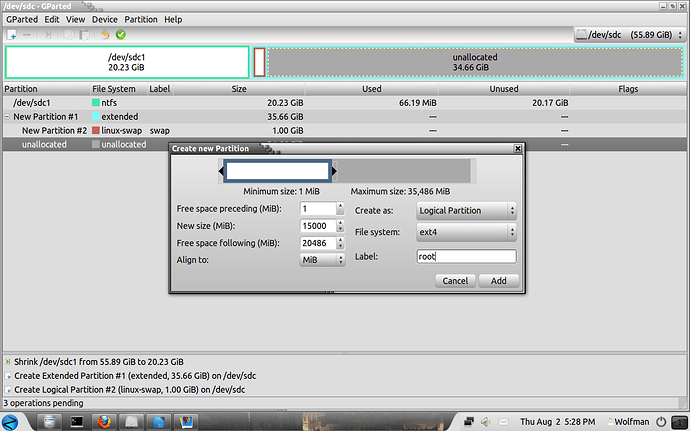
Right click in the empty space then “New”, in “New size” type 15000, Create as “Logical Partition, “File system “ext4” then on add, label is “root” which will become our “root” partition during the install, make a mental note of the size you have allocated as we need to know what partition is what during the installation of our operating system, all we are doing at the moment is getting our partitions ready for a full installation of an operating system.
I always use about 20Gb for “root” under normal circumstances, remember this is a demo drive and only 60GB in size!!.
Pic 9:
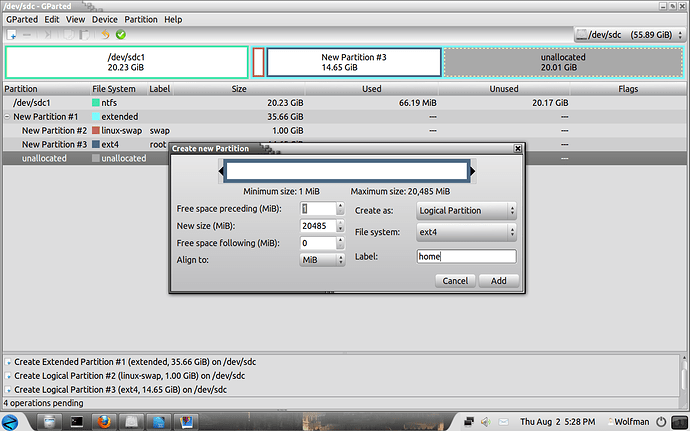
So now we have “swap” and “root” partitions, that leaves just our “home” partition.
Right click in the remaining space “New” and you can leave the New size as it is as we are going to use the remaining space for our “home” partition, “Create as” is still “Logical Partition and “File system is “ext4”, click on “Add” when finished.
Pic 10:
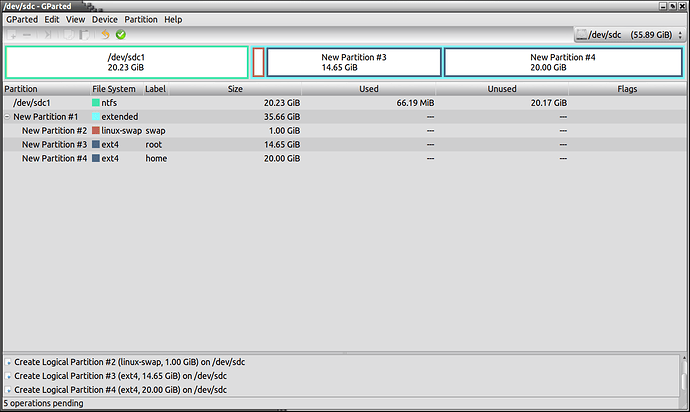
And this is now this is what you should have in front of you, all you now need to do is to click on the “Apply” button (white tick in green circle) and wait for it to finish doing its thing. Once you press that button, there is no turning back so make sure you double check everything before you commit.
Pic 11:
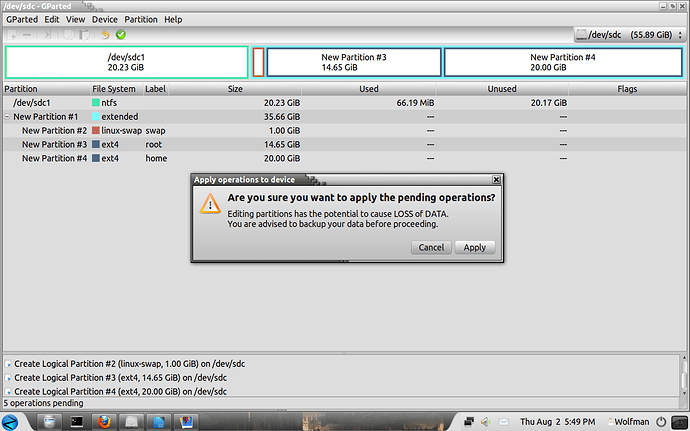
You will get one last warning. Click on “Apply” if you are sure!!.
Pic 12:
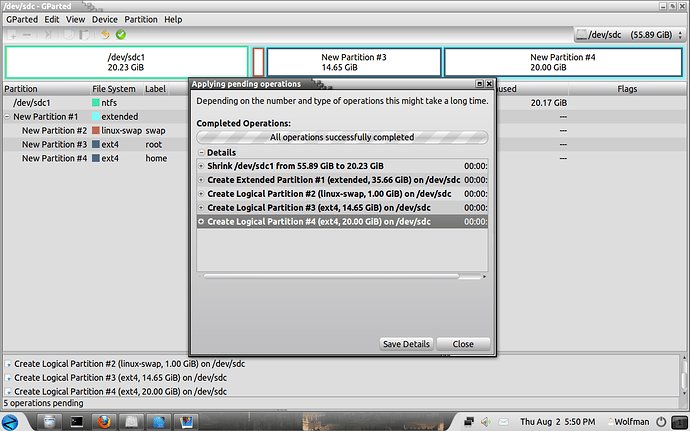
You will get confirmation that the operations were successful.
Pic 13:
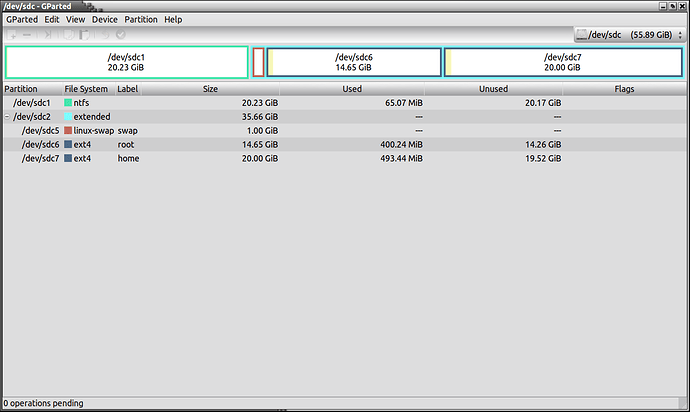
Now your gparted layout should look like this.
Pic 14:
You will now notice that the partitions have a drive letter, /dev/sdc1 is the Windows partition, sdc2 is Extended, sdc5 is swap, sdc6 is root and sdc7 is home, Linux does not use the same method for drive description as Windows and that is why it does not say “C Drive” for the Windows partition.
Now when it comes to installing any Linux system, under Ubuntu based systems, select “Something else” when asked where you want to install your OS
Part 2: Windows Strikes Back.(The return of Bill & Co)
Okay, so now you have had it with Linux, your hardware didn't work, you couldn't get your head around the way Linux runs and you miss all the viruses on Windows and you want to remove Linux and replace all the partition(s) for Windows only.
Wait!, have you saved all the stuff off of your Linux partitions that you want??, once you delete these partitions, all data on those partitions is gone forever!!.
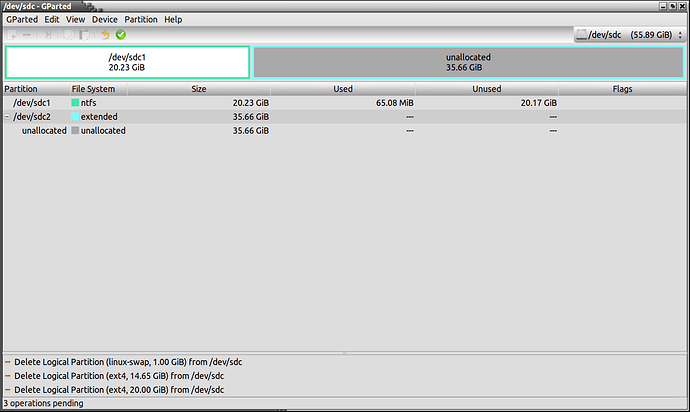
What we will do now is remove the Linux partitions and reset our drive to one partition only.
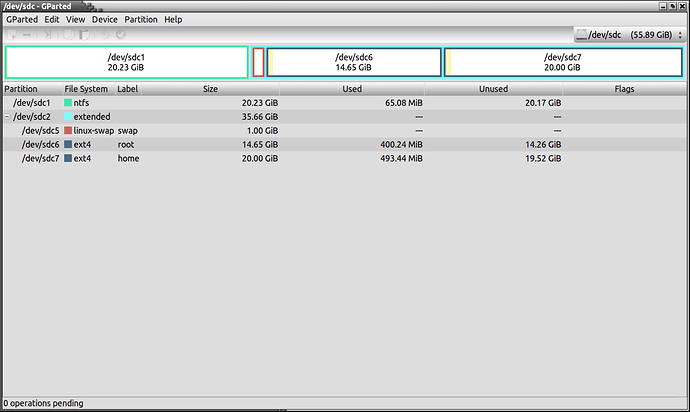
Assuming you only created the 3 standard Linux partitions, your drive map (layout) should look like this
Pic 15:
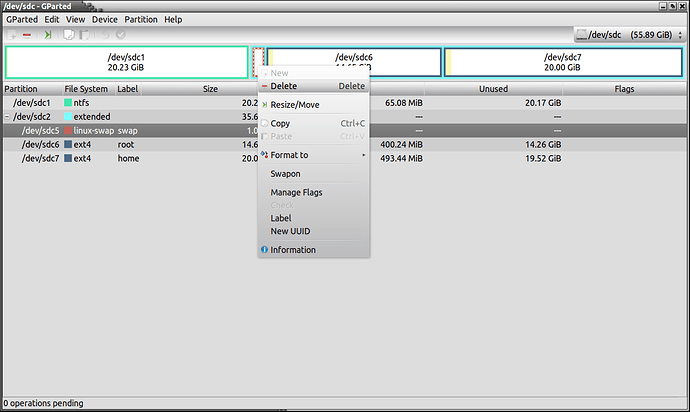
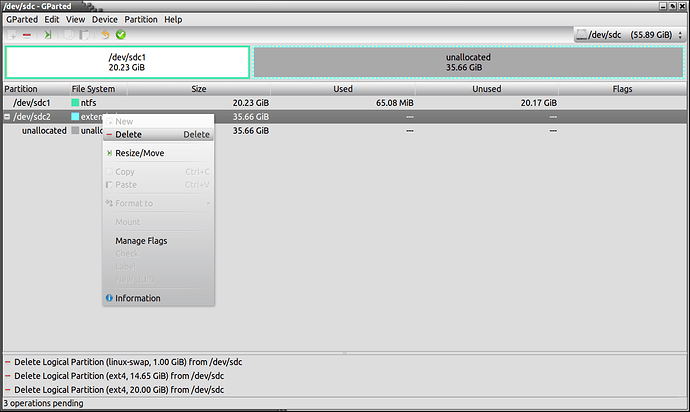
Now, right click each of the Linux partitions in the boxes and then on delete. Do all 3 one after the other.
Pic 16:
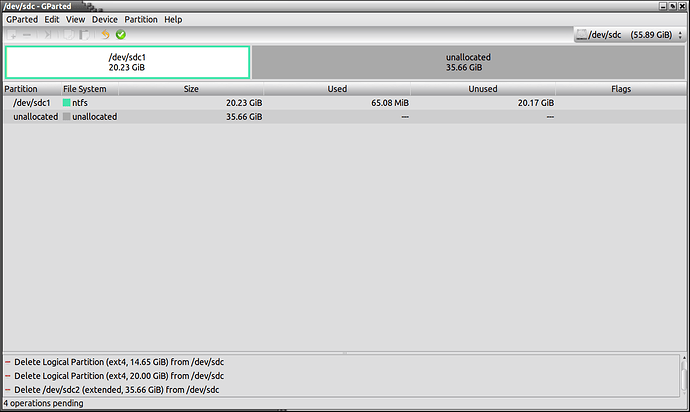
Once you have deleted all 3 Linux partitions, your layout should now look like this.
Pic 17:
You will now see that we have no Linux partitions but we still have the “Extended” partition which also needs to be deleted. Right click on the word “Extended” in the list on the left and delete the extended partition.
Pic 18:
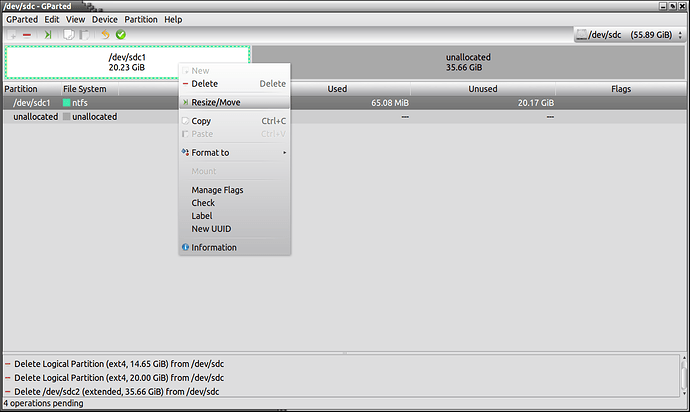
Now your layout should look like this.
Pic 19:
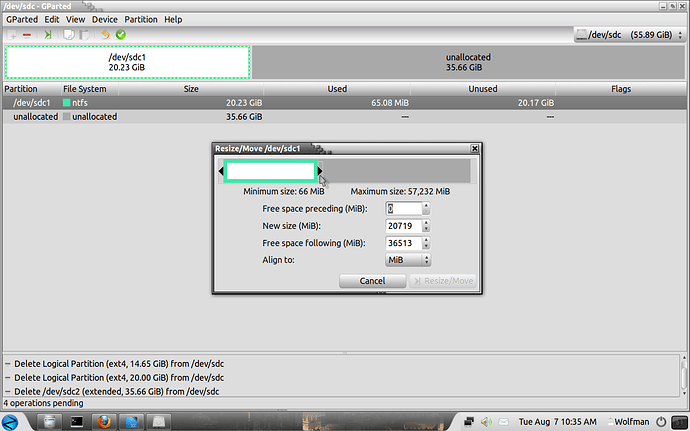
Now we have our unallocated space on the right of the layout and we will resize our Windows partition. Right click the Windows partition and then on “Resize/Move.
Pic 20:
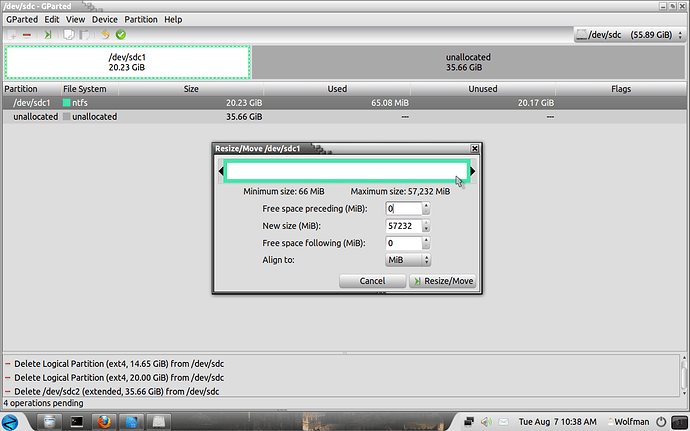
Now you will have a small window, move your mouse over the right black arrow and hold it down and drag it all the way to the right.
Pic 21:
Then you should now have a window that looks like this.
Pic 22:
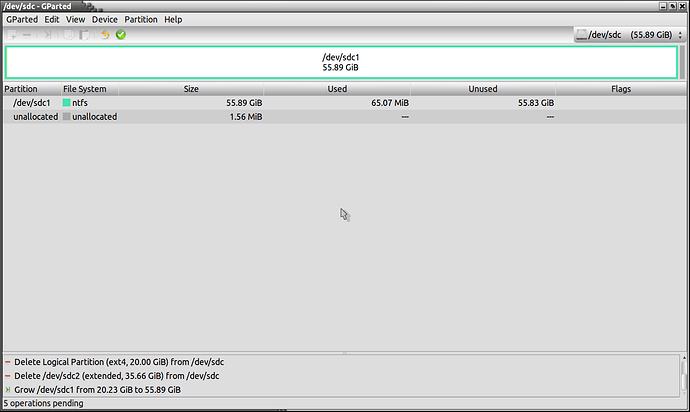
Once you click on the “Resize/Move” button, you will have a window like this.
Pic 23:
Now, just check to see that you have a window something like mine and then you can click on “Apply” when you are satified that everything is okay.
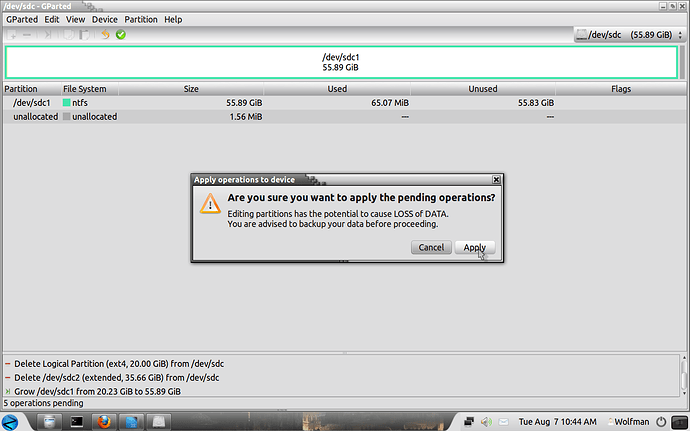
Wait!!!!, double check before you commit just be on the safe side. You will get one last chance to do just that.
Pic 24:
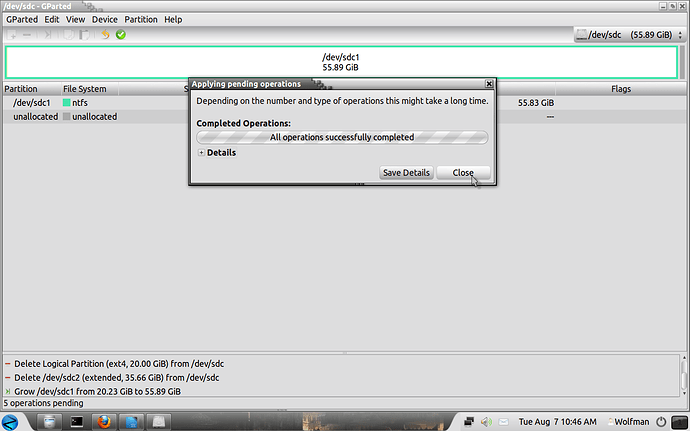
Click on “Apply” when you want to finish the operations you have selected, be sure that everything is correct!!.
Pic 25:
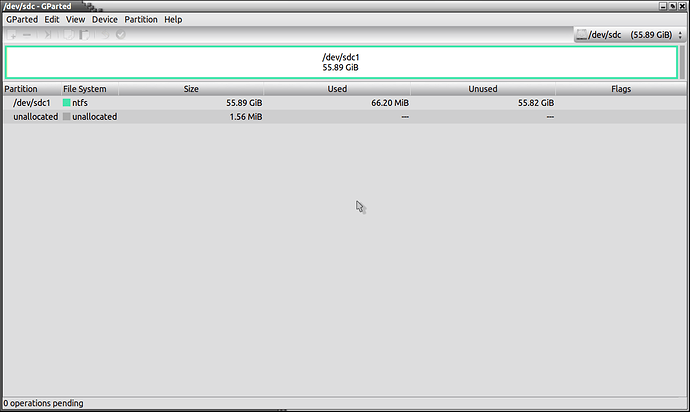
Close the window and you are done!!.
Pic 26:
Close Gparted and restart your PC with the Windows disk inserted in the drive because now we must repair the “Bootloader” or “MBR” which no longer exists.
Please see this video link on how to do this, or you can download “Boot Repair” and create a disk which will automate the job for you!:
For Windows 7.
For windows XP/Vista.
For Boot Repair:
(You need the “MBR” options tab)
Once you have repaired the “MBR”, you can start using Windows again.
Boot Repair is available in "Welcome" as part of Ubuntu Mate 16.04, start the live cd > Welcome > Installation Help > Dual Booting Boot > Boot Repair and follow the instructions, take your time!.
Part 3: Linux Returns. (Completely remove Windows and only use Linux with a double setup)
The following is only an example of a setup, you can do any number of combinations!.
Okay, so now we have decided that we only want Linux on our drive and we want to remove Windows completely and create partitions for Linux systems only.
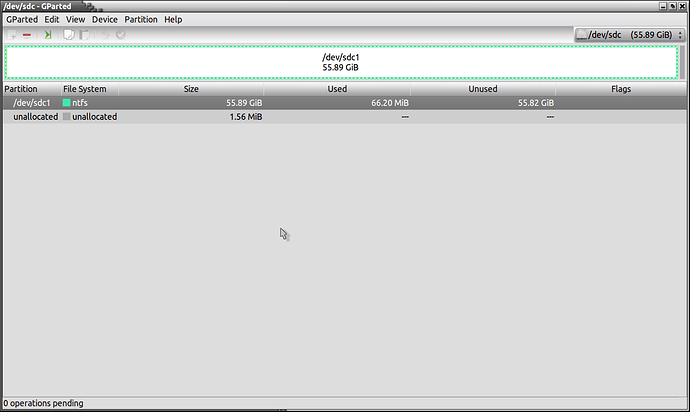
Your current layout should look something like this.
Pic 27:
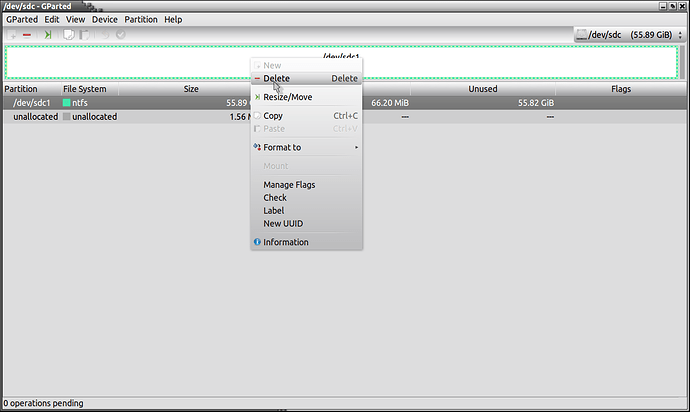
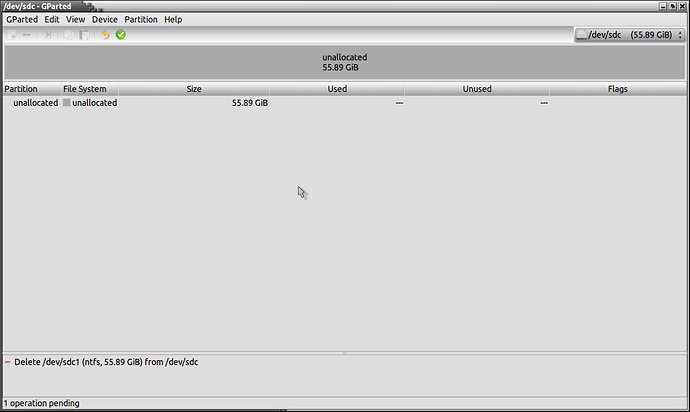
We now want to delete this partition completely, right click on the big box and then on delete.
Pic 28:
We now have a clear box with no partitions in it.
Pic 29:
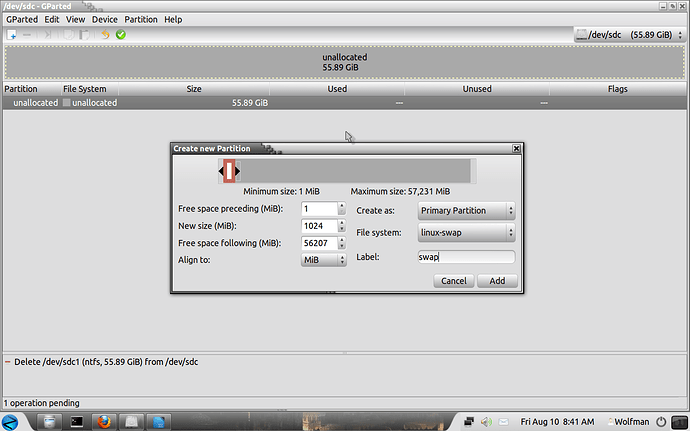
We only need one swap partition, right click on the box then "New", (see part one for swap size) and create our Swap partition.
Create as "Primary Partition". File System = Linux-Swap. Label = swap. Click on "Add".
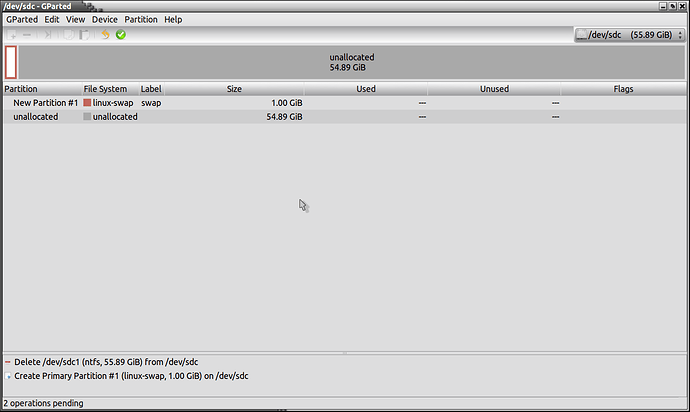
Pic 30:
Now our layout looks like this.
Pic 31:
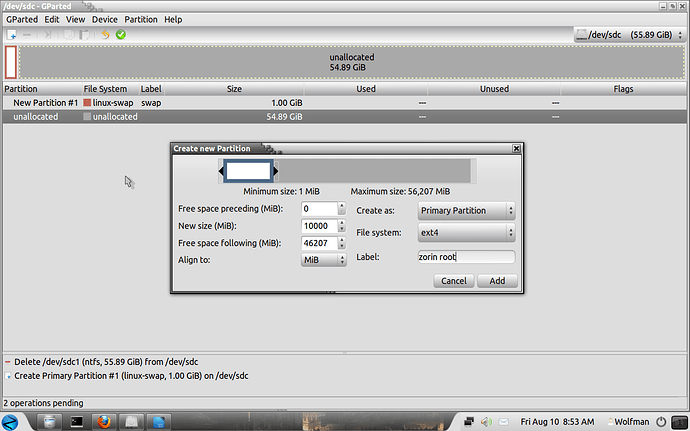
Now we can create our root partition, right click on the box then "New", Create as "Primary Partition". File System = Ext4, Label = mate root. Click on "Add".
Pic 32:
Now our layout looks like this.
Pic 33:
Now we can create our home partition, right click on the box then "New", Create as "Primary Partition". File System = Ext4, Label = mate home
Pic 34:
Now our layout looks like this.
Pic 35:
If we were only creating one home partition, we would have used all the remaining space on the drive, let us add another root and home partiton so we can install 2 version of Linux, remember, we only need one swap.
We must create an Extended Partiton, right click on the box then "New", Create as "Extended Partition". Label = extended partition, a label is not necessary, you can label it if you want to. Click on "Add" when done.
Pic 36:
Now our layout looks like this.
Pic 37:
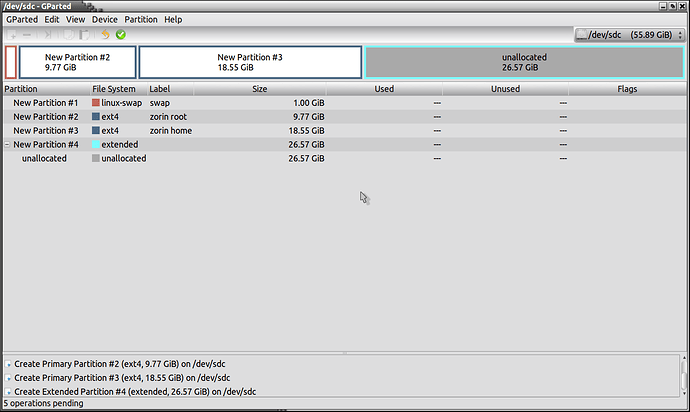
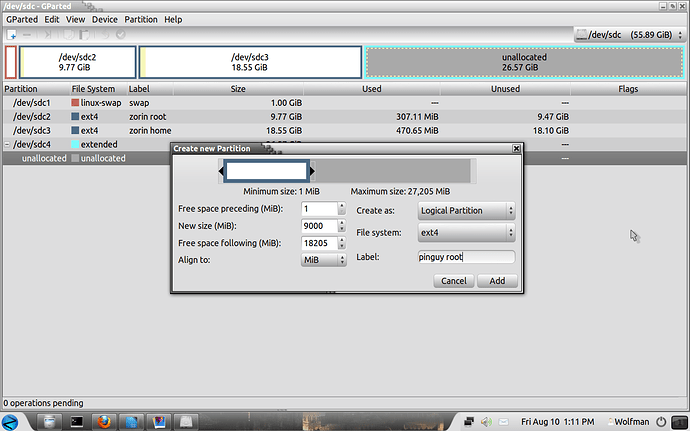
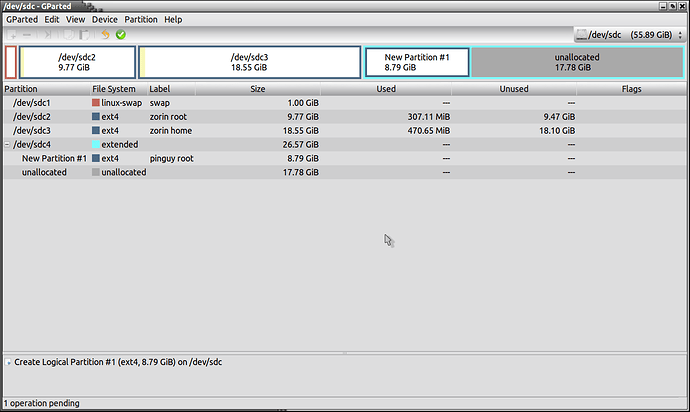
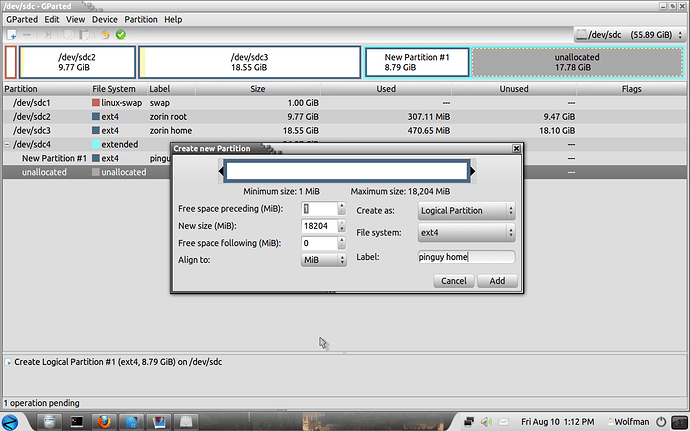
Now all that remains is to create another root and home partition and you have now got 5 partitions with which you can install 2 versions of Linux on.
Now create the last of our root and home partitions, right click on the box then "New", Create as "Primary Partition". File System = Ext4, Label = pinguy root and pinguy home (or whatever the name happens to be!).
Pic 38:
Pic 39:
Pic 40:
Now we are finished and your drive should look like this.
Pic 41:
All you have to do now is click on "Apply" and let it do its thing, you will be asked if you want to continue, click on "Apply" only if you are sure!!.
Pic 42:
You will get confirmation about the success of the operations and you can click on close.
Pic 43:
Thats it, now we are finished and your drive should look like this.
Pic 44:
I have not been able to test the following so please see the accompanying links if things are wrong somewhere!.
Part 4: Create a UEFI boot partition. + swap + root + home partitions.
You may not even be able to boot a USB stick of DVD without first disabling UEFI on your PC, please remember that!.
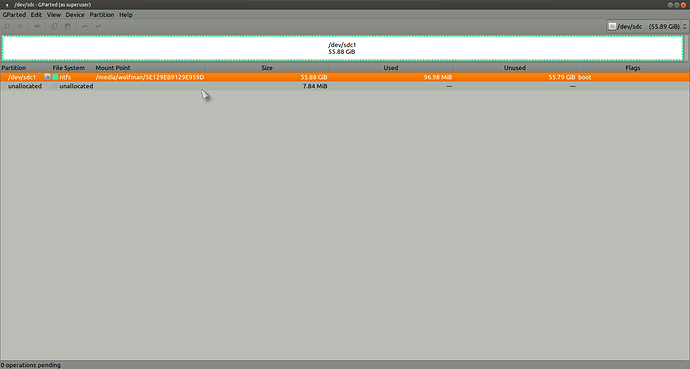
You only have Windows partitions and want to remove it/them and use Linux on a UEFI PC:
Pic 45:
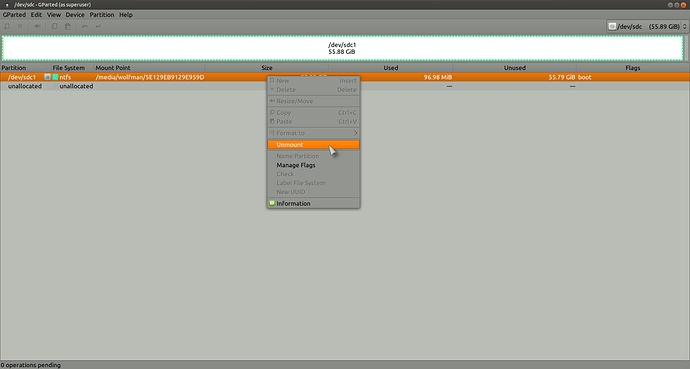
Firstly make sure the drive is not mounted before you start to partition and unmount it if necessary (it won't let you do anything anyway unless you unmount it!):
Pic 46:
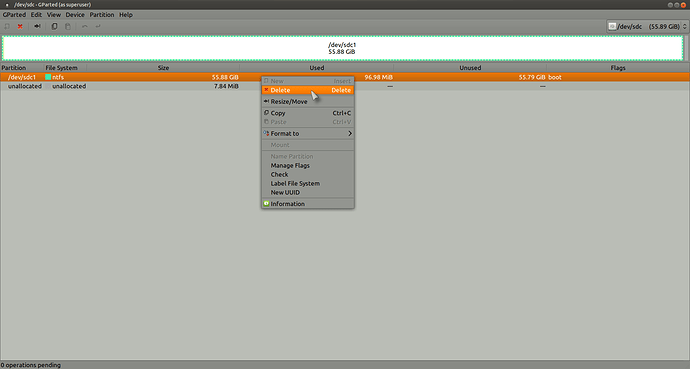
Now right click and delete all partitions on your drive.
Pic 47:
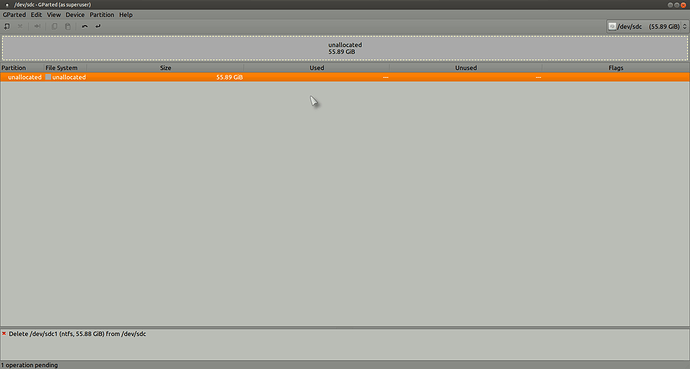
Once all your partitions are deleted, you should have something like this in front of you!.
Pic 48:
Now you can create your partitions for a normal Linux installation.
A UEFI partition is only needed on PC's with Windows 8 onwards, normally a PC with anything less (Win7 /XP) will not require a UEFI boot partition!.
See:
and for people with GPT partitioning:
Right click the empty box and then on "New".
Pic 49:
Create a partition of 512MB to a max of 1GB (1024MBs) and as file system type "FAT32" and click on "Add".
Pic 50:
Now create a "swap" partition of the same size as your RAM and File system type "linux-swap".
Pic 51:
Now create your "root" partition and I suggest you use about 15GB with a files system type "Ext4". Then create your "home" partition using the rest of the free pace on the drive also as "Ext4":
Pic 52:
Once all your partitions have been created, click on "Apply" and you should now have the following in front of you.
Pic 53:
You can now use the "Something Else" method to install Linux on your system BUT IT IS VERY IMPORTANT THAT YOU SET THE UEFI BOOTLOADER TO THE RESERVED FAT32 UEFI PARTITION OTHERWISE YOUR SYSTEM WILL NOT BOOT!:
I hope this guide has helped you and if you have any questions, please post them on the forum!.
Best regards. Wolfman ![]()
