These are my own setting preferences, use at your own risk!.
AN IMPORTANT NOTE FOR LINUX BEGINNERS. WHEN YOU ARE IN RECOVERY MODE, THE KEYBOARD DEFAULTS TO US ENGLISH, IF YOU HAVE ANY OTHER LANGUAGE KEYBOARD OTHER THAN US ENGLISH, WHEN YOU TYPE "Y" (FOR "YES"), IT MIGHT SHOW UP AS A DIFFERENT LETTER, ON MY KEYBOARD I MUST PRESS THE "Z" KEY WHICH EQUATES TO "Y" AS I HAVE A GERMAN KEYBOARD, JUST PRESS "BACKSPACE" AND HIT A DIFFERENT KEY UNTIL YOU SEE THE "Y" SHOW UP!. ![]()
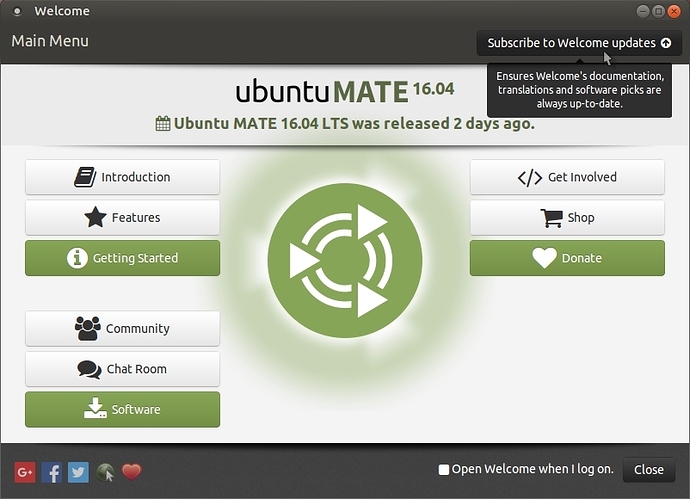
Click on "Subscribe to Welcome updates" after starting Welcome.:
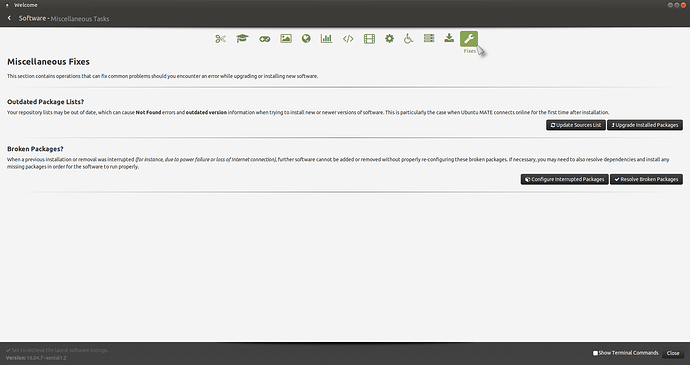
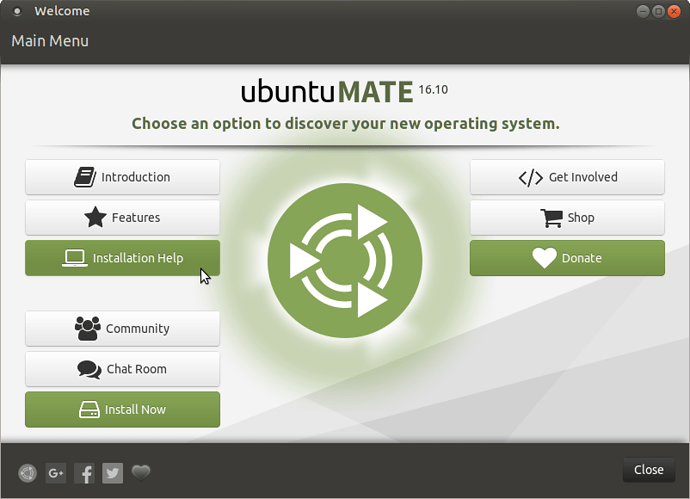
Some problems for beginners can be easily solved using "Welcome", Welcome is a system tool which is great for people starting out in the Ubuntu Mate Linux world and want/need assistance in getting started or are trying to find their way around their new operating system. If you have no idea about how the system works, to do your very first update, open Welcome (Top panel > System > Welcome) and then on "Software > Software Boutique > Fixes" (spanner/wrench symbol) and there are a few options open to you:
Please be aware that if you use Synaptic to update your system and you have critical system updates, make sure you restart after closing Synaptic as Synaptic will not issue a warning that a restart is necessary!.
To install Synaptic via the terminal (press Ctrl + Alt + t and the terminal will open):
sudo apt-get install synaptic
Complete Synaptic "How-To" guides here: (Synaptic is not pre-installed in Ubuntu Mate!)
List of topics covered here:
Welcome all-round tool for Ubuntu Mate (See above)
Install Synaptic: (See above)
Restart your system after updating (See Synaptic above too!):
Reset Ubuntu Password:
System Update:
Booting into recovery mode:
If you only have an Ubuntu based system on your PC:
If you have more than one operating system installed use the following method:
To update your system fully, use the following commands in a terminal:
NB: "dist-upgrade" will not udate your OS to the next highest version!
Forcing an update:
Run an update (or install/remove a package) using the command line in "Recovery Mode":
Partial Update:
Replacing Files:
Software Sources Settings:
Synaptic > Settings > Repositories > Additional Drivers:
Changing your software sources download location:
Fixing Broken Packages:
Error messages about "Duplicate Sources":
Broken Upgrade or Installation:
Repairing the Grub Menu:
Removing unwanted applications:
Stopping a package from updating (Locking):
When using the terminal:
APT Explained in more detail: (Advanced Packaging Tool)
And all commands:
Boot Options explained in more detail:
Ubuntu Software Center:
Restart your system after updating:
As the title above suggests, when you do regular updates; regardless of which method you use to do so, you should restart your system (PC) for that "Just in case scenario" where something relating to the system was installed/updated. It often won't advise you to do so, so if you have a lot of updates, you should restart, those few seconds you take to do so, can possibly save you hours of head scratching and headache if you don't!. (This is only a recomendation but an advisable one!).
Reset Ubuntu Password:
To reset your password should you need to do so, follow the advice on this link:
See also:
System Update:
Assuming you have already installed and are now looking for some assistance in some way, you can ignore this first part if you already started your system for the first time, this is merely a suggestion.
Immediately after installing your system I recommend booting into "Advanced Options" > "Recovery Mode" (don't do a first boot but boot straight into "Advanced Options" > "Recovery Mode") and running "dpkg" see below in "Fixing Broken Packages" about cable connection as this will only work with a network cable connected), once you have run dpkg; and you re-boot, set your "Software Sources" (see below) list and update again due to the changes made to the software sources lists!!. (I know this may sound strange but its something I found that seems to work well for me!.)
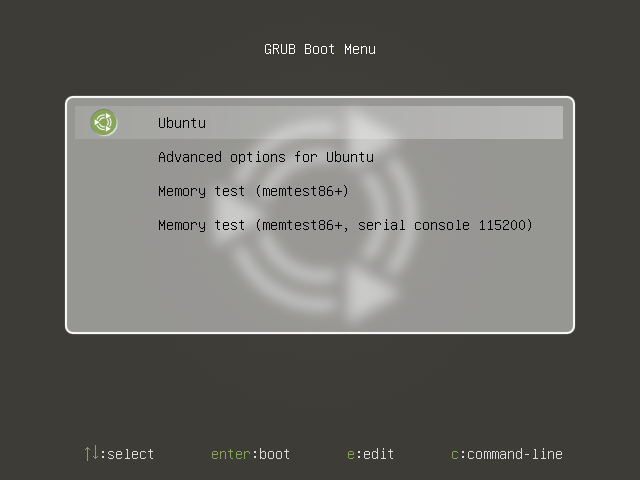
Select the 2nd option "Advanced options for Ubuntu:
Or you might see "Previous Linux versions" with which you can choose an older kernel if you are having problems booting a newer kernel!:
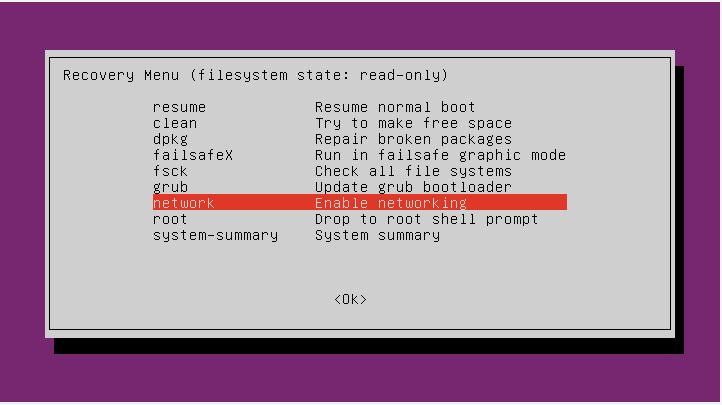
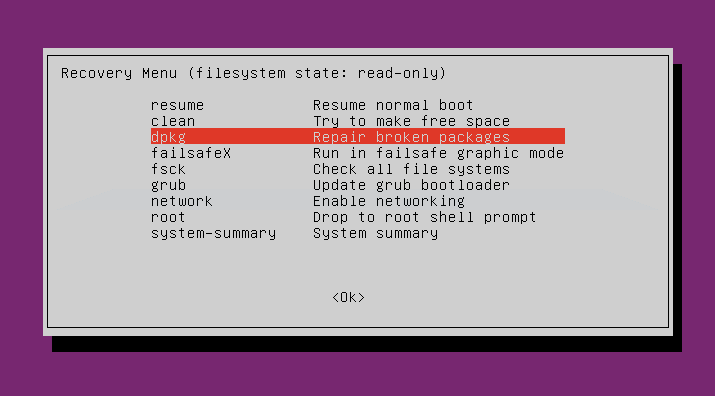
From the menu, select "Network" first and then "Dpkg". (A NETWORK CABLE CONNECTION IS REQUIRED FOR THIS TO WORK)
After running DPKG, restart your PC with Ctrl + Alt + Del, do not click on resume because there might have been updates for your graphics card and a restart is the smart thing to do!.
Booting into recovery mode:
See also:
If you only have an Ubuntu based system on your PC:
Switch on your computer and wait until the BIOS finishes loading (you will probably see a logo of your computer manufacturer)
The following messages may show up:
**Grub loading stage1.5

Grub loading, please wait...**
Quickly press the Shift key and hold it down when booting (normally Esc in older versions of Ubuntu!), which will bring up a boot menu. (If you see the Ubuntu logo, you've missed the point where you can enter the GRUB menu)
Select the line ending with '(recovery mode)', probably the second line, something like:
Ubuntu, kernel 2.6.17-10-generic (recovery mode)
Press enter and your machine will begin the boot process.
After a few moments, your workstation should display a menu with a number of options. One of the options (you may need to scroll down to the bottom of the list) will be "Drop to root shell prompt".
If you have more than one operating system installed use the following method:
Switch on your PC and wait until you see the GRUB menu, select the 2nd option (2nd line down) and select the 2nd line again, the one that ends "Recovery Mode". (This is working on the assumption that the OS you last installed was indeed an Ubuntu based system and the GRUB bootloader is being used!)
To update your system fully, use the following commands in a terminal:
(The first part of the command will update your package list, the second part of the command will update the packages and any missing dependencies ; if there are new versions available).
sudo apt-get update && sudo apt-get dist-upgradeNB: "dist-upgrade" will not udate your OS to the next highest version!.
Forcing an update:
The only difference about the force command is the "-f" at the end of the command which denotes the "force" part of the command. This will make sure that any missing dependencies get installed too!.
sudo apt-get update && sudo apt-get dist-upgrade -fRun an update (or install/remove a package) using the command line in "Recovery Mode":
Start in recovery mode and first activate "Network" and then click on "root", then type the above commands (write it down on paper first), this is much the same as running "DPKG". ![]()
To remove a package, just use the normal remove command like the following:
sudo apt-get remove firefox
Firefox is only an example, type the name of the package you want to remove replacing "firefox with the real package name!.
A real good example would be graphics card drivers which may be causing a problem, lets use an Nvidia package as an example:
sudo apt-get remove nvidia-304
which will remove the Nvidia 304 drivers package, again, restart with Ctrl + alt + Del, don't click on "Resume"!.
You can also do the same as the above commands using Synaptic, open Synaptic and click on "Reload" then "Mark All Updates" and lastly on "Apply". (Except the force part!!!!)
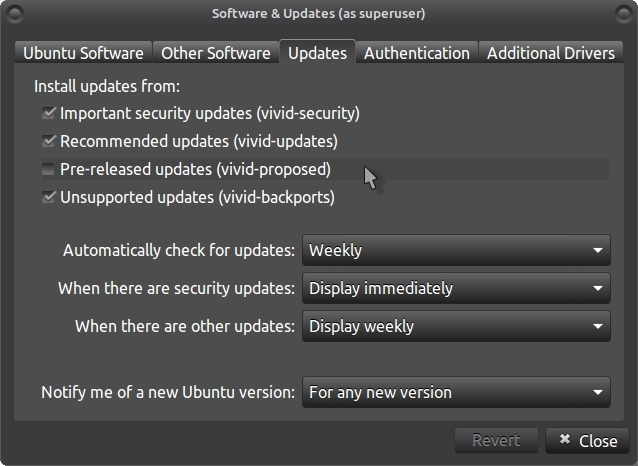
Make sure that your sources lists are active and set to "Main". You can do this via Synaptic > Settings > Repositories
Partial Update:
If you are asked whether you just wish to do a "partial update" (or upgrade); you should say "Yes" as it most likely won't advance anyway in the update process, it will normally say that it can (will) only update a few packages and once the partial update is done, then you should continue on to a full update assuming that there is indeed anything to update!.
Replacing Files:
Sometimes when updating you will be asked if you want to replace an existing file with a new one, the normal default action is to say no, I on the other hand find it better to install the new one, you must decide yourself whether or not you wish to do the same, I recommend replacing the existing file with the new one!!. (Use at your own risk but I have never had a problem doing just that!.)
In the same token, you may be asked if you want to remove unwanted/orphaned files, again you should say yes!.
There are occasions when replacing files might undo changes you’ve intentionally made to your system – especially if you’re 2 years into a LTS release and the change(s) you made was just after the initial release. Assuming you don’t remember changes to the file and want to insure that you can maintain the changes going forward I suggest making a backup of the existing file BEFORE you click on replace. After the system is finished then you can examine the 2 files for differences.
This linked tutorial provides step by step instructions using simple commands executed in a terminal. commands used cp diff ls sudo
Software Sources Settings:
if you have a problem with the software sources update, please see this How-To which should give you tips on how to keep your system fully updated.
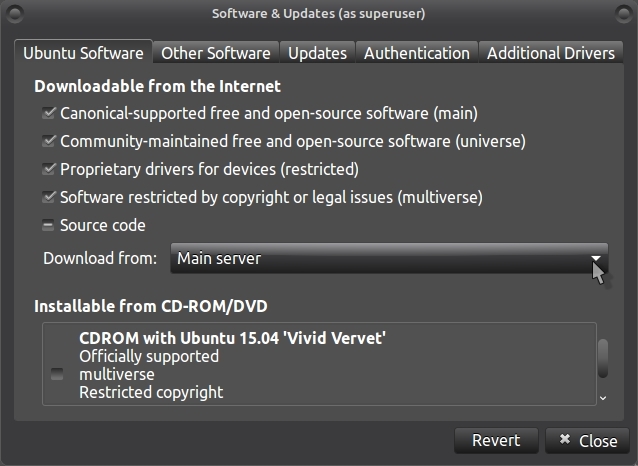
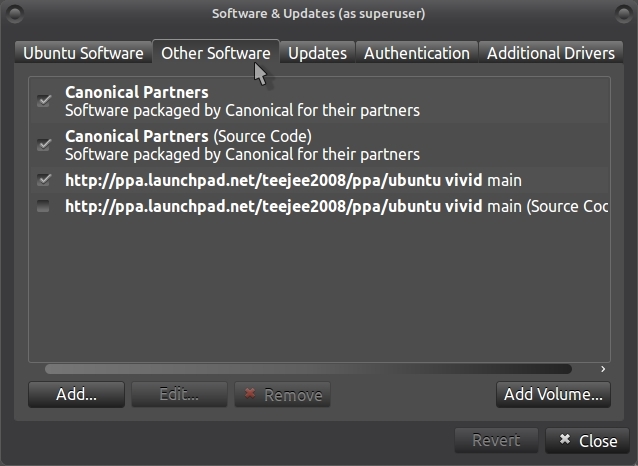
I recommend using the "Main" repository download link and make sure you click on "Canonical" if you want "Nonfree" software (Skype etc)!.
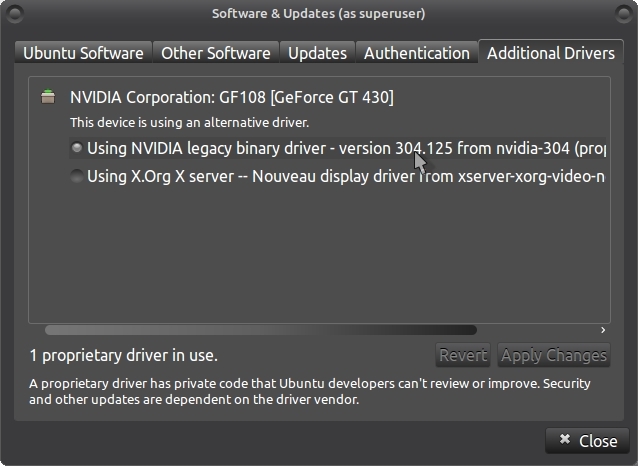
For additional graphic card drivers (if your graphics card is supported), the addtional hardware drivers tool is now intergrated into Synaptic.
Synaptic > Settings > Repositories > Additional Drivers:
Changing your software sources download location:
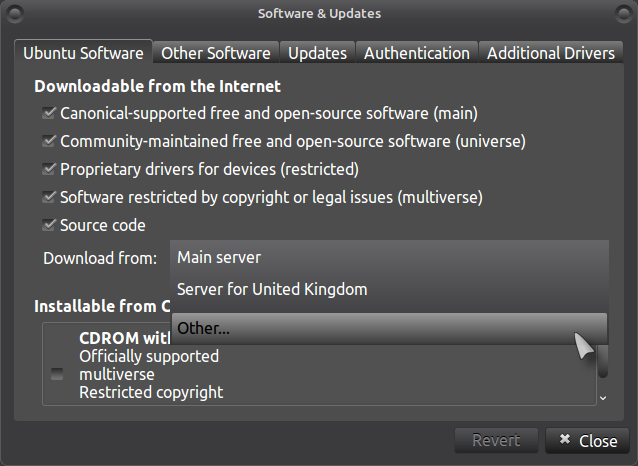
If you are having a problem with the downloads, you can change the download location with:
Open Synaptic > Settings > Repositories > Download From > Other > Choose a country and select best server, close the windows then reload and try updating again.
Fixing Broken Packages:
There are often posts on the forum about "Broken Packages", you can solve this problem by opening: Synaptic > Edit > Fix broken packages. (You may well already be in Synaptic when you see this message!)
You can also run a command to fix this; run this command in a terminal:
sudo dpkg --configure -a
The above command may not be necessary!.
sudo apt-get --fix-missing install
The above command downloads and installs any missing packages on your system.
sudo apt-get --fix-broken install
The above command downloads and installs any broken dependencies on your system.
The third option is to restart your PC and go into "Recovery Mode" then activate "Network" and run "dpkg" in the list. When asked if you should continue, press "y" (for yes even if it says that there are no updates available) and then enter, this will run any updates and repairs it needs to!!.
This option requires a working cable network connection, it may not work with a WiFi connection!!. Click on "Network" to activate the network before trying to use the internet to update the system. If you are on a laptop/notebook/netbook and you get error messages, ignore them and continue, it is whining about not finding the WiFi drivers!.
(I could not get it to work with WiFi (I didn't try that hard) although there are solutions they are for the advanced users only, see the only answer here: http://askubuntu.com/questions/104066/enable-wi-fi-in-recovery-terminal ).
Error messages about "Duplicate Sources":
If you get error messages about duplicate source lists or similar, you can enter the following commands in a terminal to solve this problem:
sudo rm -r /var/lib/apt/lists/*then:
sudo apt-get updateThe other option is to simply ignore them which won't make them go away, but it still works for me!!.
Broken Upgrade or Installation:
What to do if an installation process fails and you find it is no longer possible to install or remove packages:
Open a Terminal and type the following commands, pressing the Return or Enter key after each (you may have to type in your password):
sudo dpkg --configure -afollowed by
sudo apt-get install -fThe first of the above commands fixes the "You have held Broken Packages" message, the second command forces the package installer to force an install of the failed package installation by making sure that all dependency requirements are met!.
Repairing the Grub Menu (Scroll down a bit and look at the options to use "Welcome" first!):
The Grub menu is the menu you see at the very beginning of the boot process from which you can select the various options it has to offer, boot into Linux, boot into Windows/Mac or boot into the recovery options menu.
If you are having a problem with the Grub Menu, open a terminal (Ctrl + Alt + t) and paste the following command and this should/will repair Grub:
sudo update-grubIf that isn't successful, keep the terminal open and run the following commands and use "Boot Repair", this works in both installed and Live CD modes:
For Ubuntu 14.04 upwards:
sudo add-apt-repository ppa:kranich/cubuntusudo apt-get update && sudo apt-get install -y boot-repair && boot-repairFor anything below Ubuntu 14.04:
sudo add-apt-repository ppa:yannubuntu/boot-repairsudo apt-get update && sudo apt-get install -y boot-repair && boot-repairIf you need to because the above didn't work in installed mode, start the Ubuntu Live CD and then use the terminal, or you can download a copy of "Boot Repair"
See also:
The above should be good for any Ubuntu version.
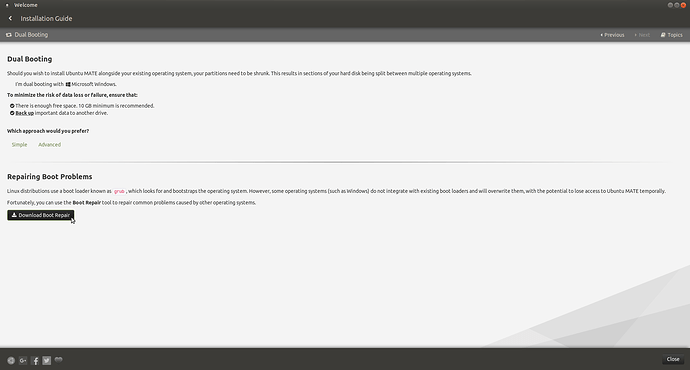
ATTENTION: From Ubuntu Mate 16.04 up, Boot Repair is a couple of clicks away in the "Welcome" menu!.
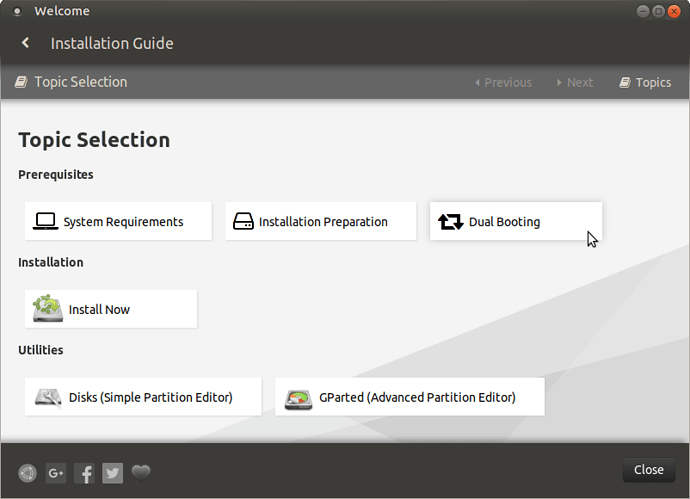
Open Welcome > Installation Help > Dual Booting and follow the instructions!.
Removing unwanted applications:
To remove an unwanted app, simply type the name of the unwanted app at the end of this terminal command:
sudo apt-get removeAs an example, choose the app "Qmail":
sudo apt-get remove qmailThe above will only remove the main body of the app but not its dependencies in case there are other packages relying on those dependencies!!. (There is also a "purge" command which I personally won't recommend!)
This can also be done via Synaptic by opening Synaptic and typing the name of the app in search and right click it and mark it for complete removal!.
If you are removing a package and you are told that it will also remove the ubuntu-desktop (ubuntu-mate-desktop) package, you do not need to worry, the package can be safely removed without any adverse effect to/on your system!.
Stopping a package from updating (Locking):
If you don't want a particular package to update, open Synaptic and find the package using search, mark it with a mouse click then go to "Panel > Lock Version > Apply" which will stop the package from updating forever, to undo this, just do the reverse!.
When using the terminal:
NB: The password will never show any signs of being written (no characters will show at all) when you type it in the terminal so make sure you type the password correctly in the first place!.
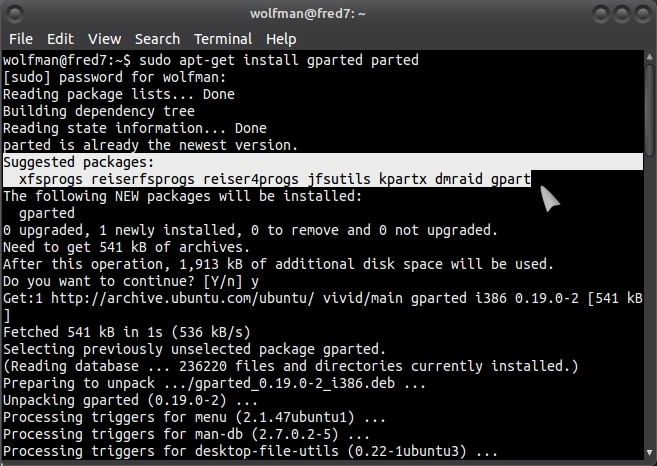
When using the terminal to install packages, keep an eye out for messages that also suggests packages to install to enhance the application you are installing, these are only suggestions but may help the app run better in some small way:
Remember that any package can be installed via the terminal providing you know the exact name of the package you want to install!. (No deviations from the package name are allowed as it will only try and install the package name you type)
As an example: "firefox":
sudo apt-get install firefox
Remember when using the terminal: Linux is case sensitive so "Downloads" is NOT "downloads".
APT Explained in more detail: (Advanced Packaging Tool)
and:
And all commands:
http://linux.die.net/man/8/apt-get
Boot Options explained in more detail:
Complete Synaptic "How-To" guides here:
Ubuntu Software Center:
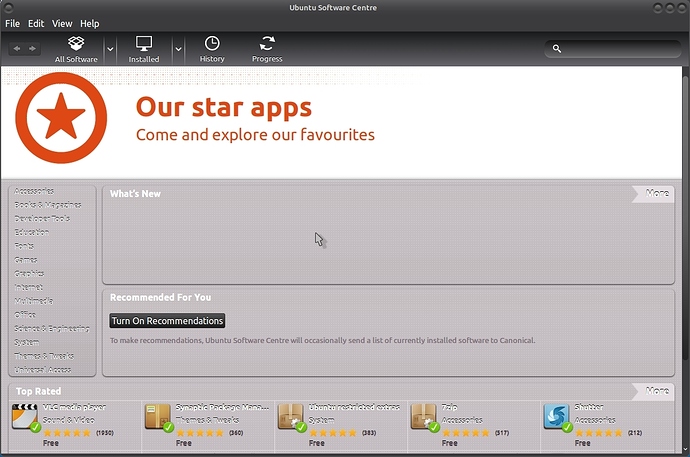
In Ubuntu Mate, you will find the (Ubuntu) Software Center in the Main Panel Menu > System> Administration > Ubuntu Software Center. You can add an icon to the desktop by right clicking and add to desktop.
AS OF UBUNTU MATE 16.04, UBUNTU SOFTWARE CENTER WILL NOT BE INSTALLED BY DEFAULT IN UBUNTU!.
Assuming it works and doesn't cause problems, it will be replaced by "Gnome Software Center", this is still to be worked on so stay tuned folks!.
To install Ubuntu Software Center if it isn't installed, run the following terminal command (Ctrl + Alt + t):
sudo apt-get install software-center
To manually fully update Ubuntu (Mate) to the next highest version, please see the following link:
and:
